
Kullanıcı ve Ders Yönetimi
Kullanıcıları yönetme
Kişiler ekranı, kurumunuzdaki tüm kullanıcıları (öğretmen ve öğrenciler dahil) görüntüleme ve yönetme yeridir. Kullanıcıları tek tek ekleyebilir, CSV gibi bir kaynaktan toplu olarak içe aktarabilir veya mevcut kayıtları düzenleyebilirsiniz.
Sadece koordinatörler
Kişiler ekranı
Sol menüden Kişiler'e tıkladığınızda kurumunuzdaki tüm kullanıcıların bulunduğu tabloya ulaşırsınız. Tabloda isim, e-posta ve kurum kimliği bilgileri yer alır; geçici kullanıcılar 'geçici' rozetiyle işaretlenir.
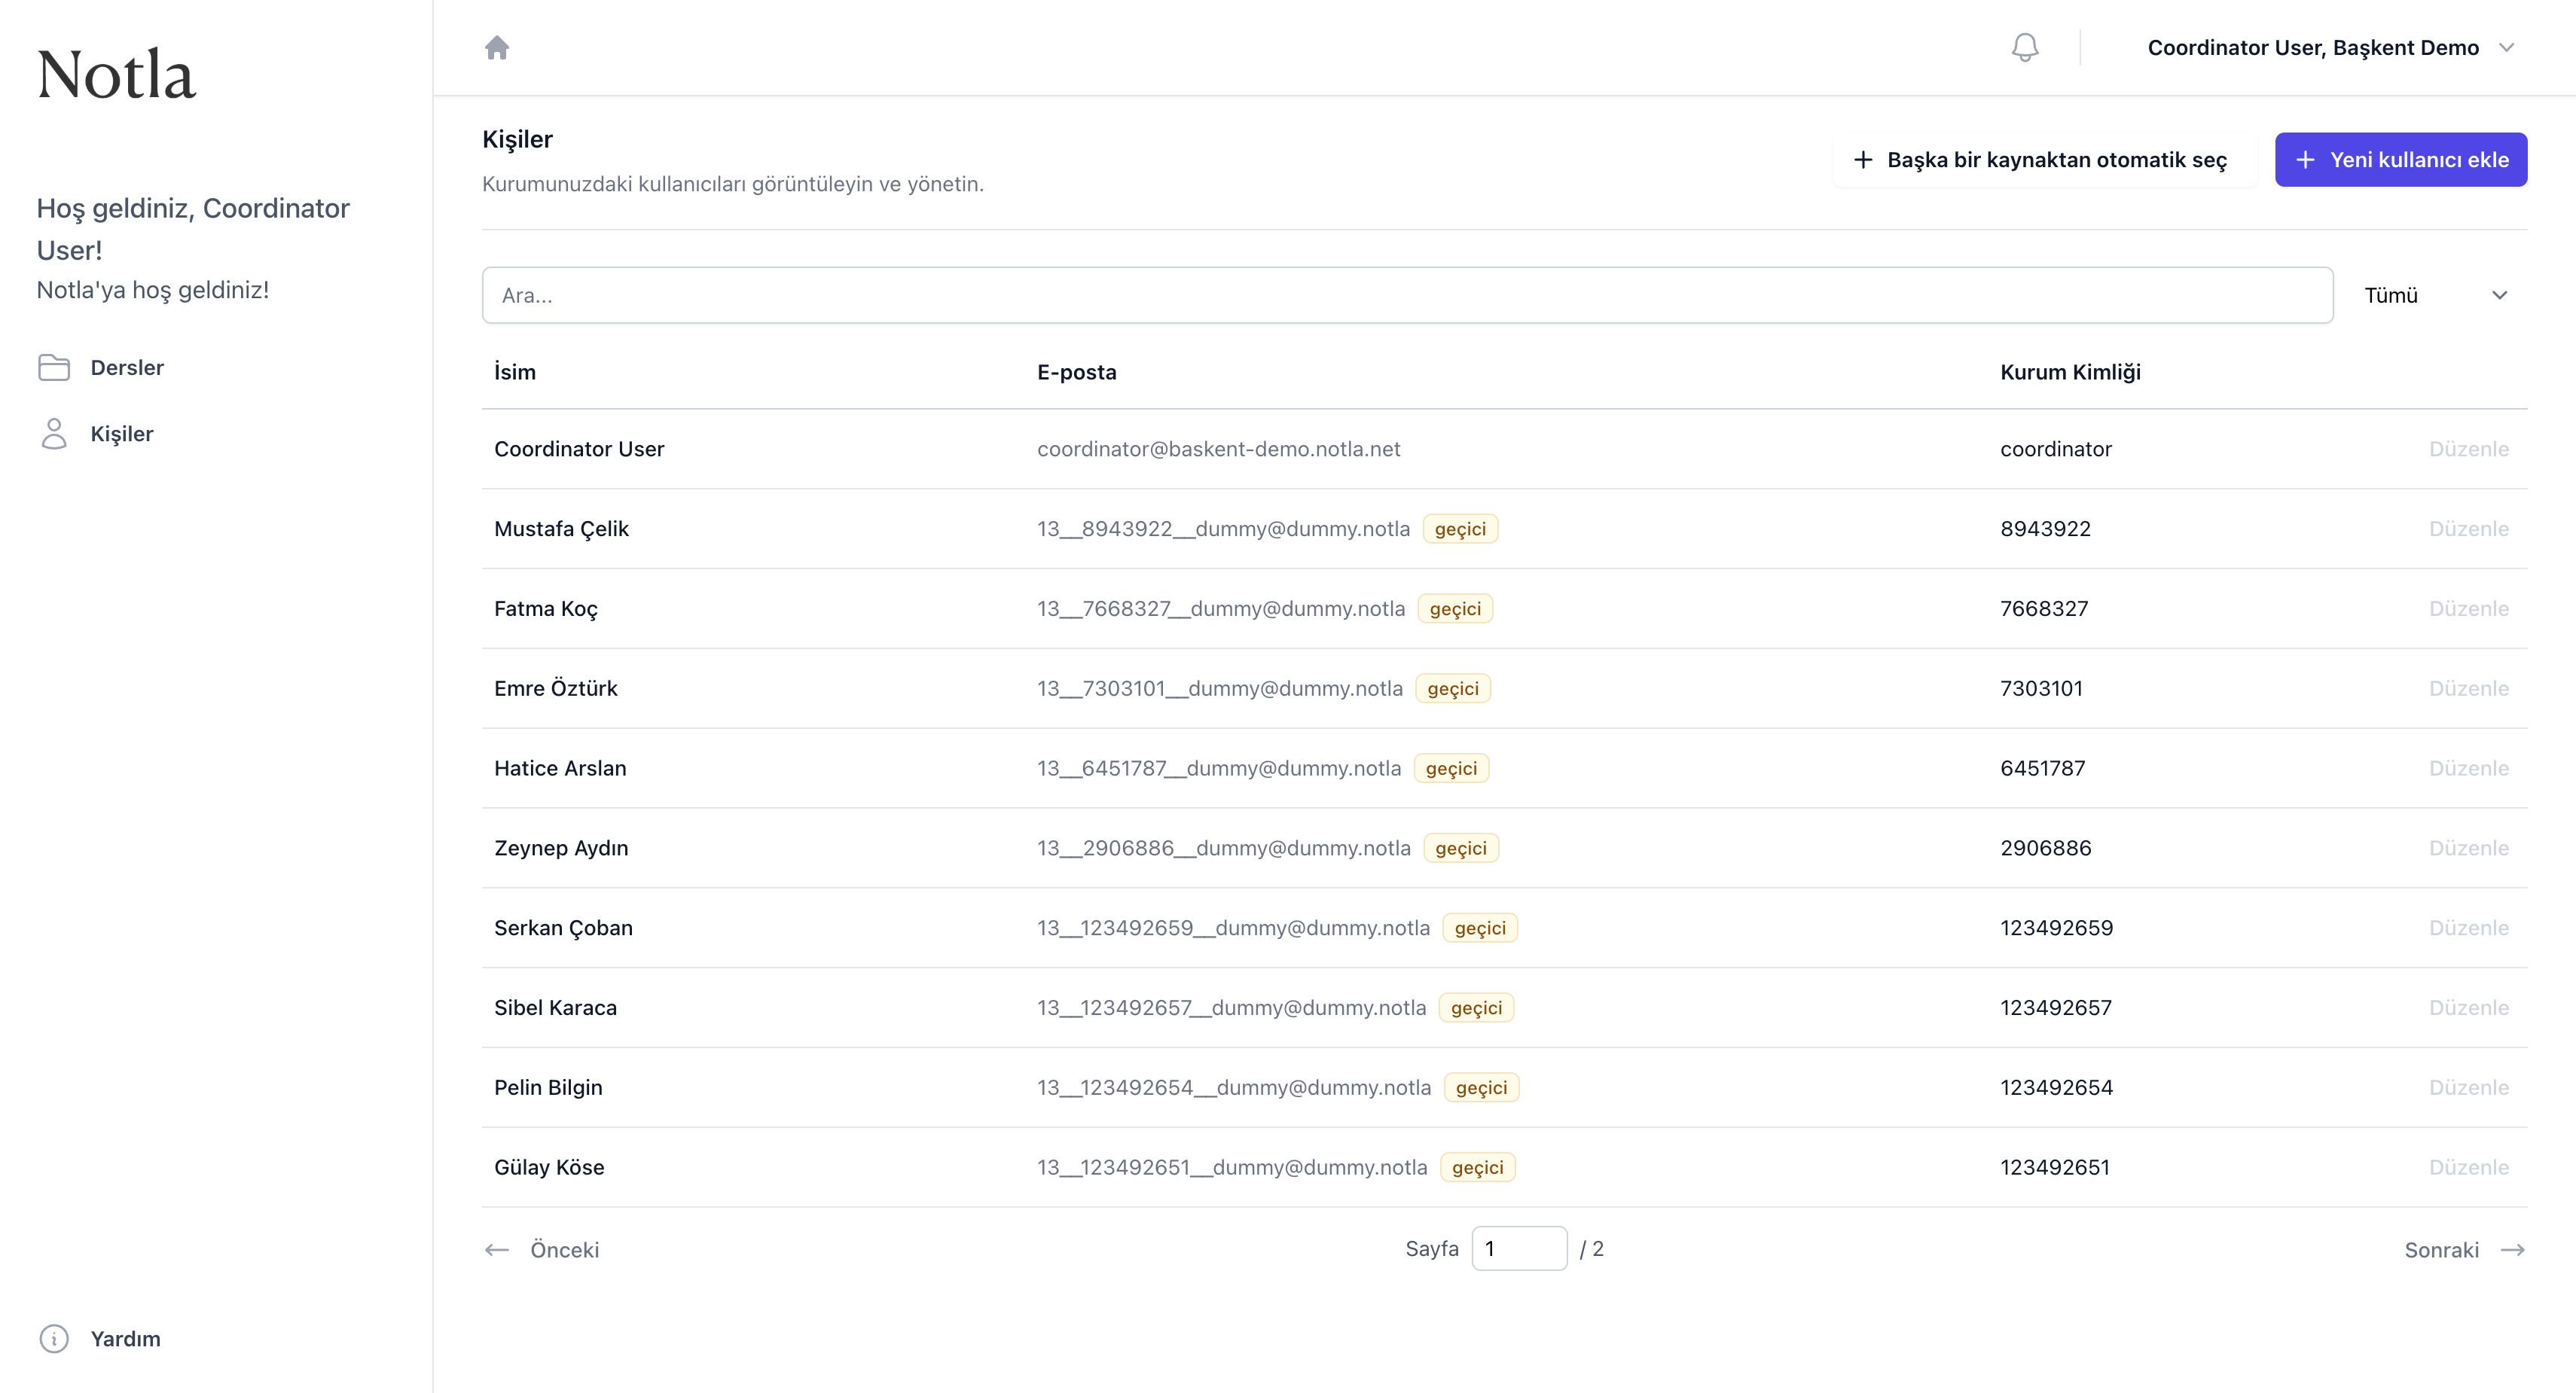
- Arama kutusu isim, e-posta veya kurum kimliği ile filtreleme yapmanızı sağlar.
- Sağ üstteki Tümü menüsü ile yalnızca öğrenciler veya öğretmenler gibi belirli rollere göre liste daraltılabilir.
- Geçici rozetli kullanıcılar, sisteme henüz kalıcı olarak kaydolmamış (örneğin davet bekleyen) kişilerdir.
- Sağdaki
Düzenlebağlantısı her satırın bilgilerini güncellemenize olanak tanır.
Tek tek kullanıcı ekleme
Sağ üstteki '+ Yeni kullanıcı ekle' düğmesi açılan kısa bir form aracılığıyla tek bir kullanıcıyı sisteme ekler. Ad, soyad ve kurum kimliği zorunlu; e-posta ise isteğe bağlıdır.
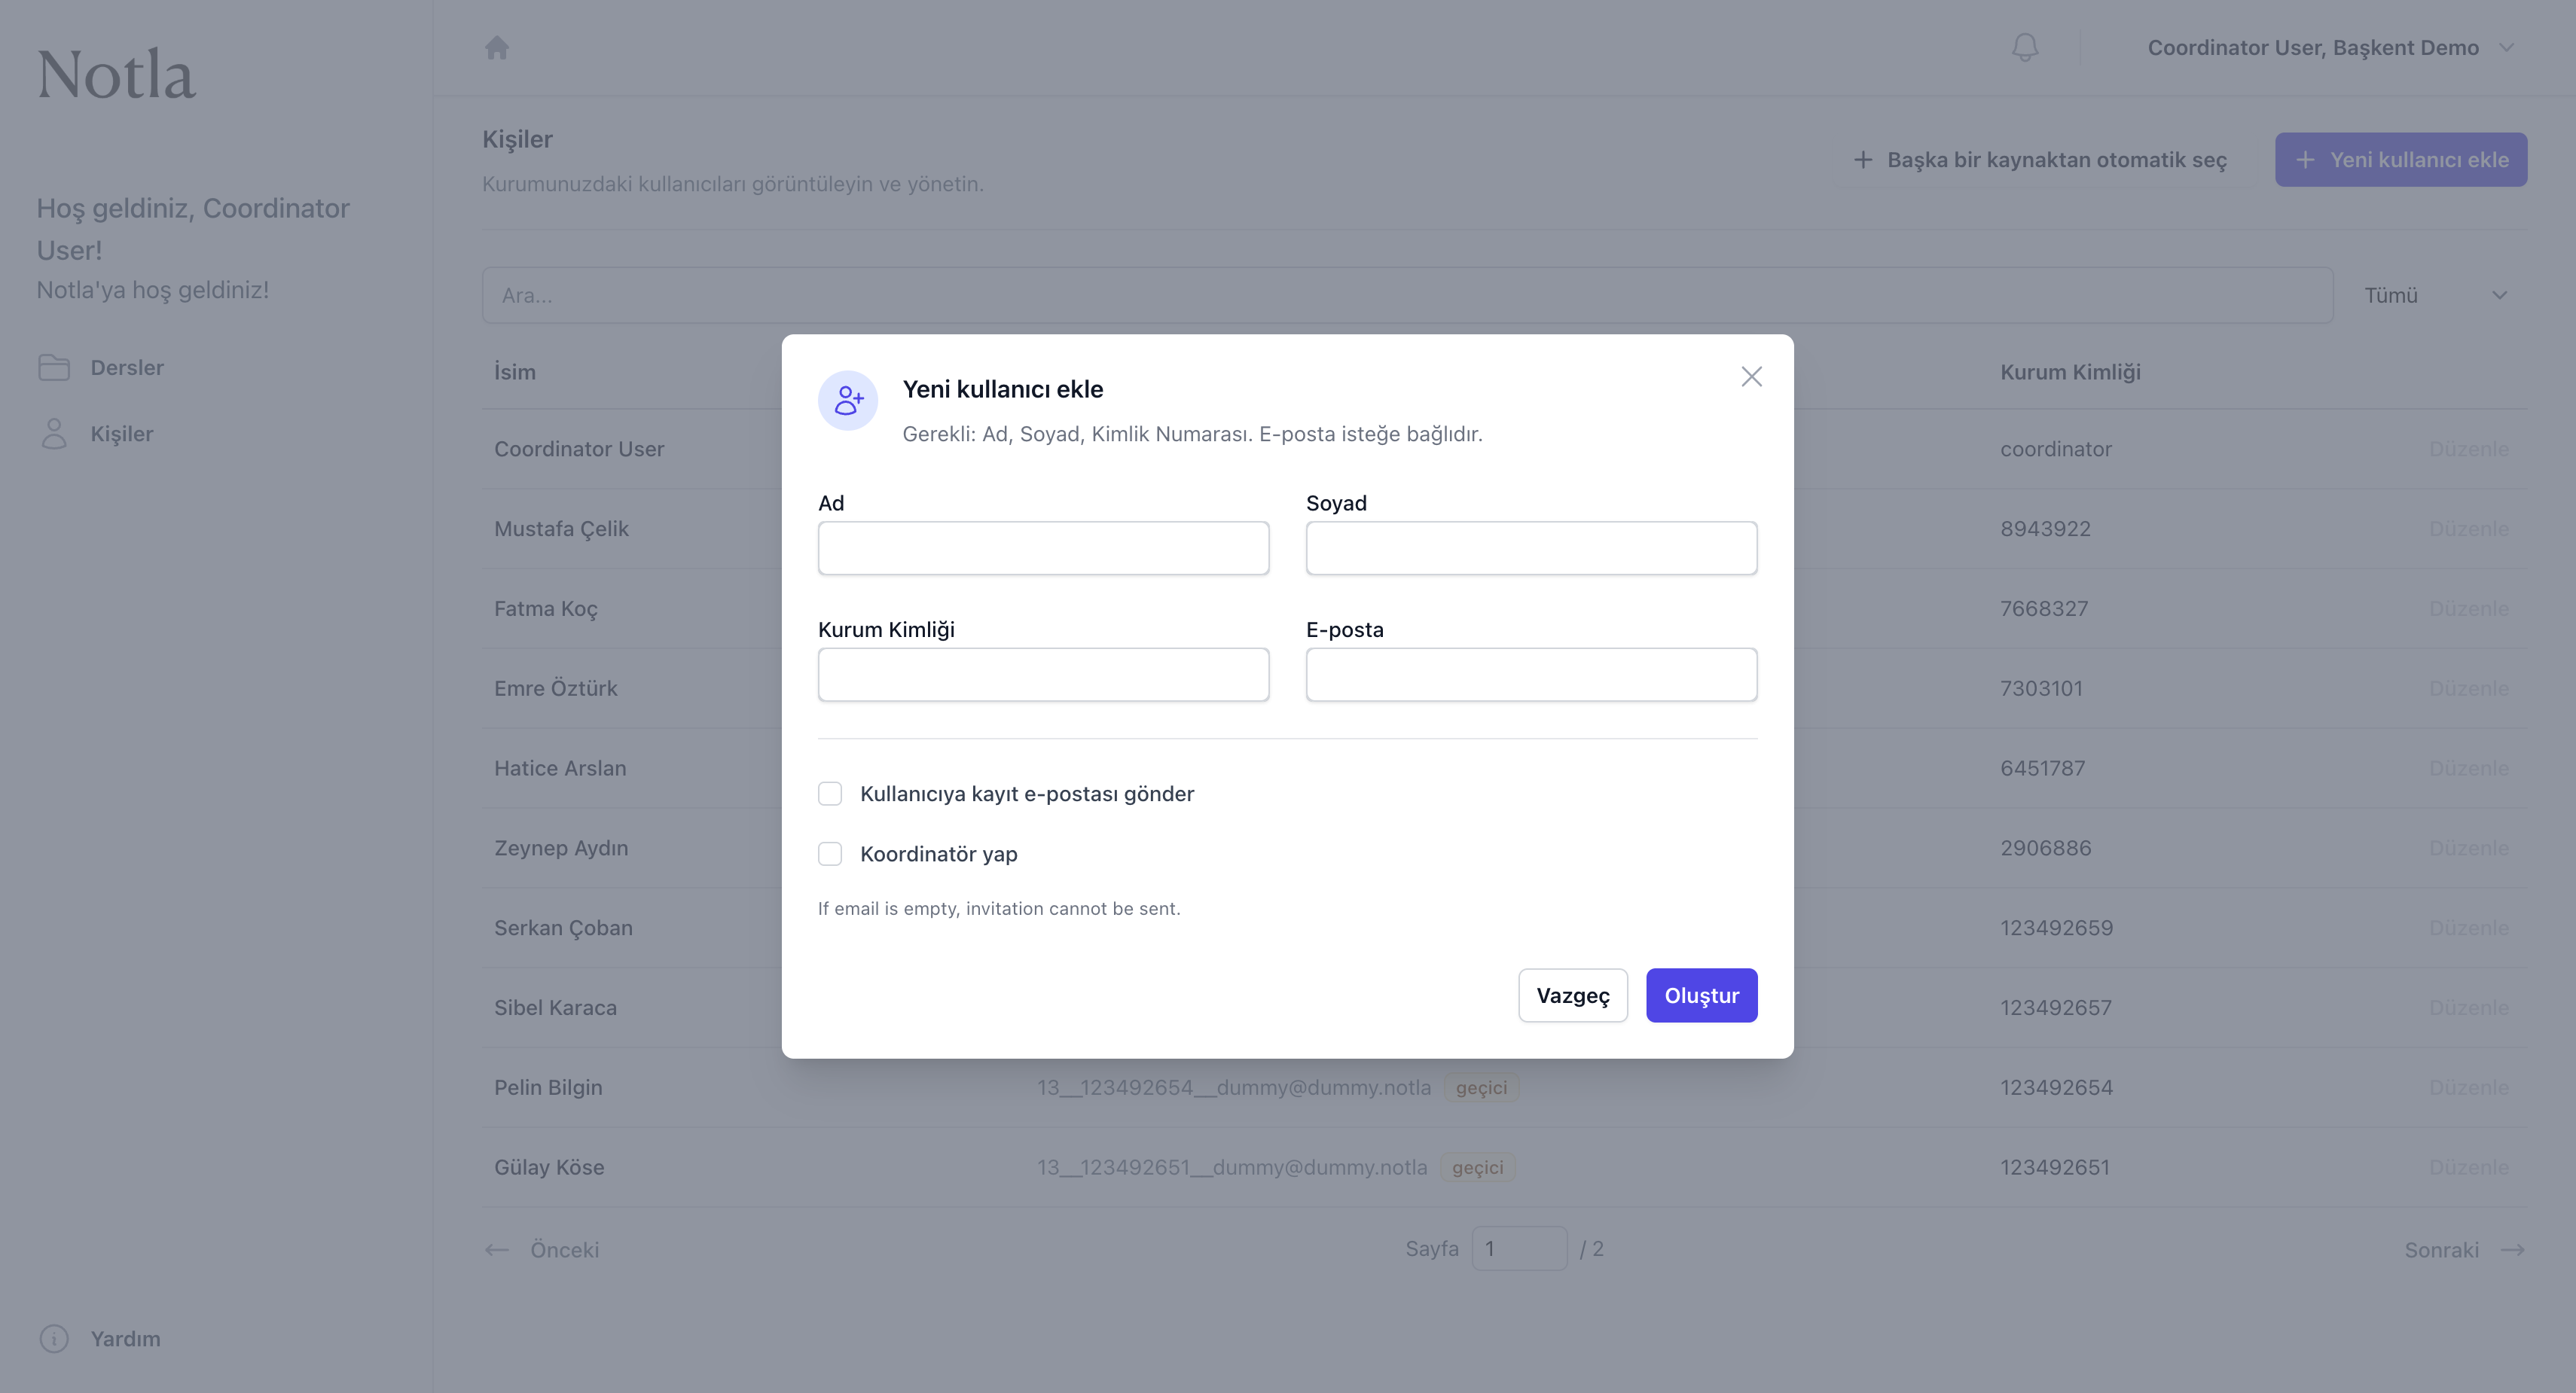
- Kurum Kimliği (örneğin TC kimlik veya okul numarası) sistemde her kullanıcı için benzersiz olmalıdır.
- E-posta alanı boş bırakılırsa kullanıcıya otomatik davet e-postası gönderilemez (uyarı dialogun altında belirtilir).
- Kullanıcıya kayıt e-postası gönder kutusu işaretlenirse, kullanıcı şifresini belirleyebileceği bir bağlantı alır.
- Koordinatör yap seçeneği, eklenen kullanıcıya sizinkiyle aynı yetkileri verir; dikkatle kullanın.
CSV ile toplu içe aktarma
Çok sayıda kullanıcıyı tek tek girmek yerine 'Başka bir kaynaktan otomatik seç' düğmesi ile CSV dosyası gibi mevcut kaynaklardan toplu içe aktarım yapabilirsiniz.
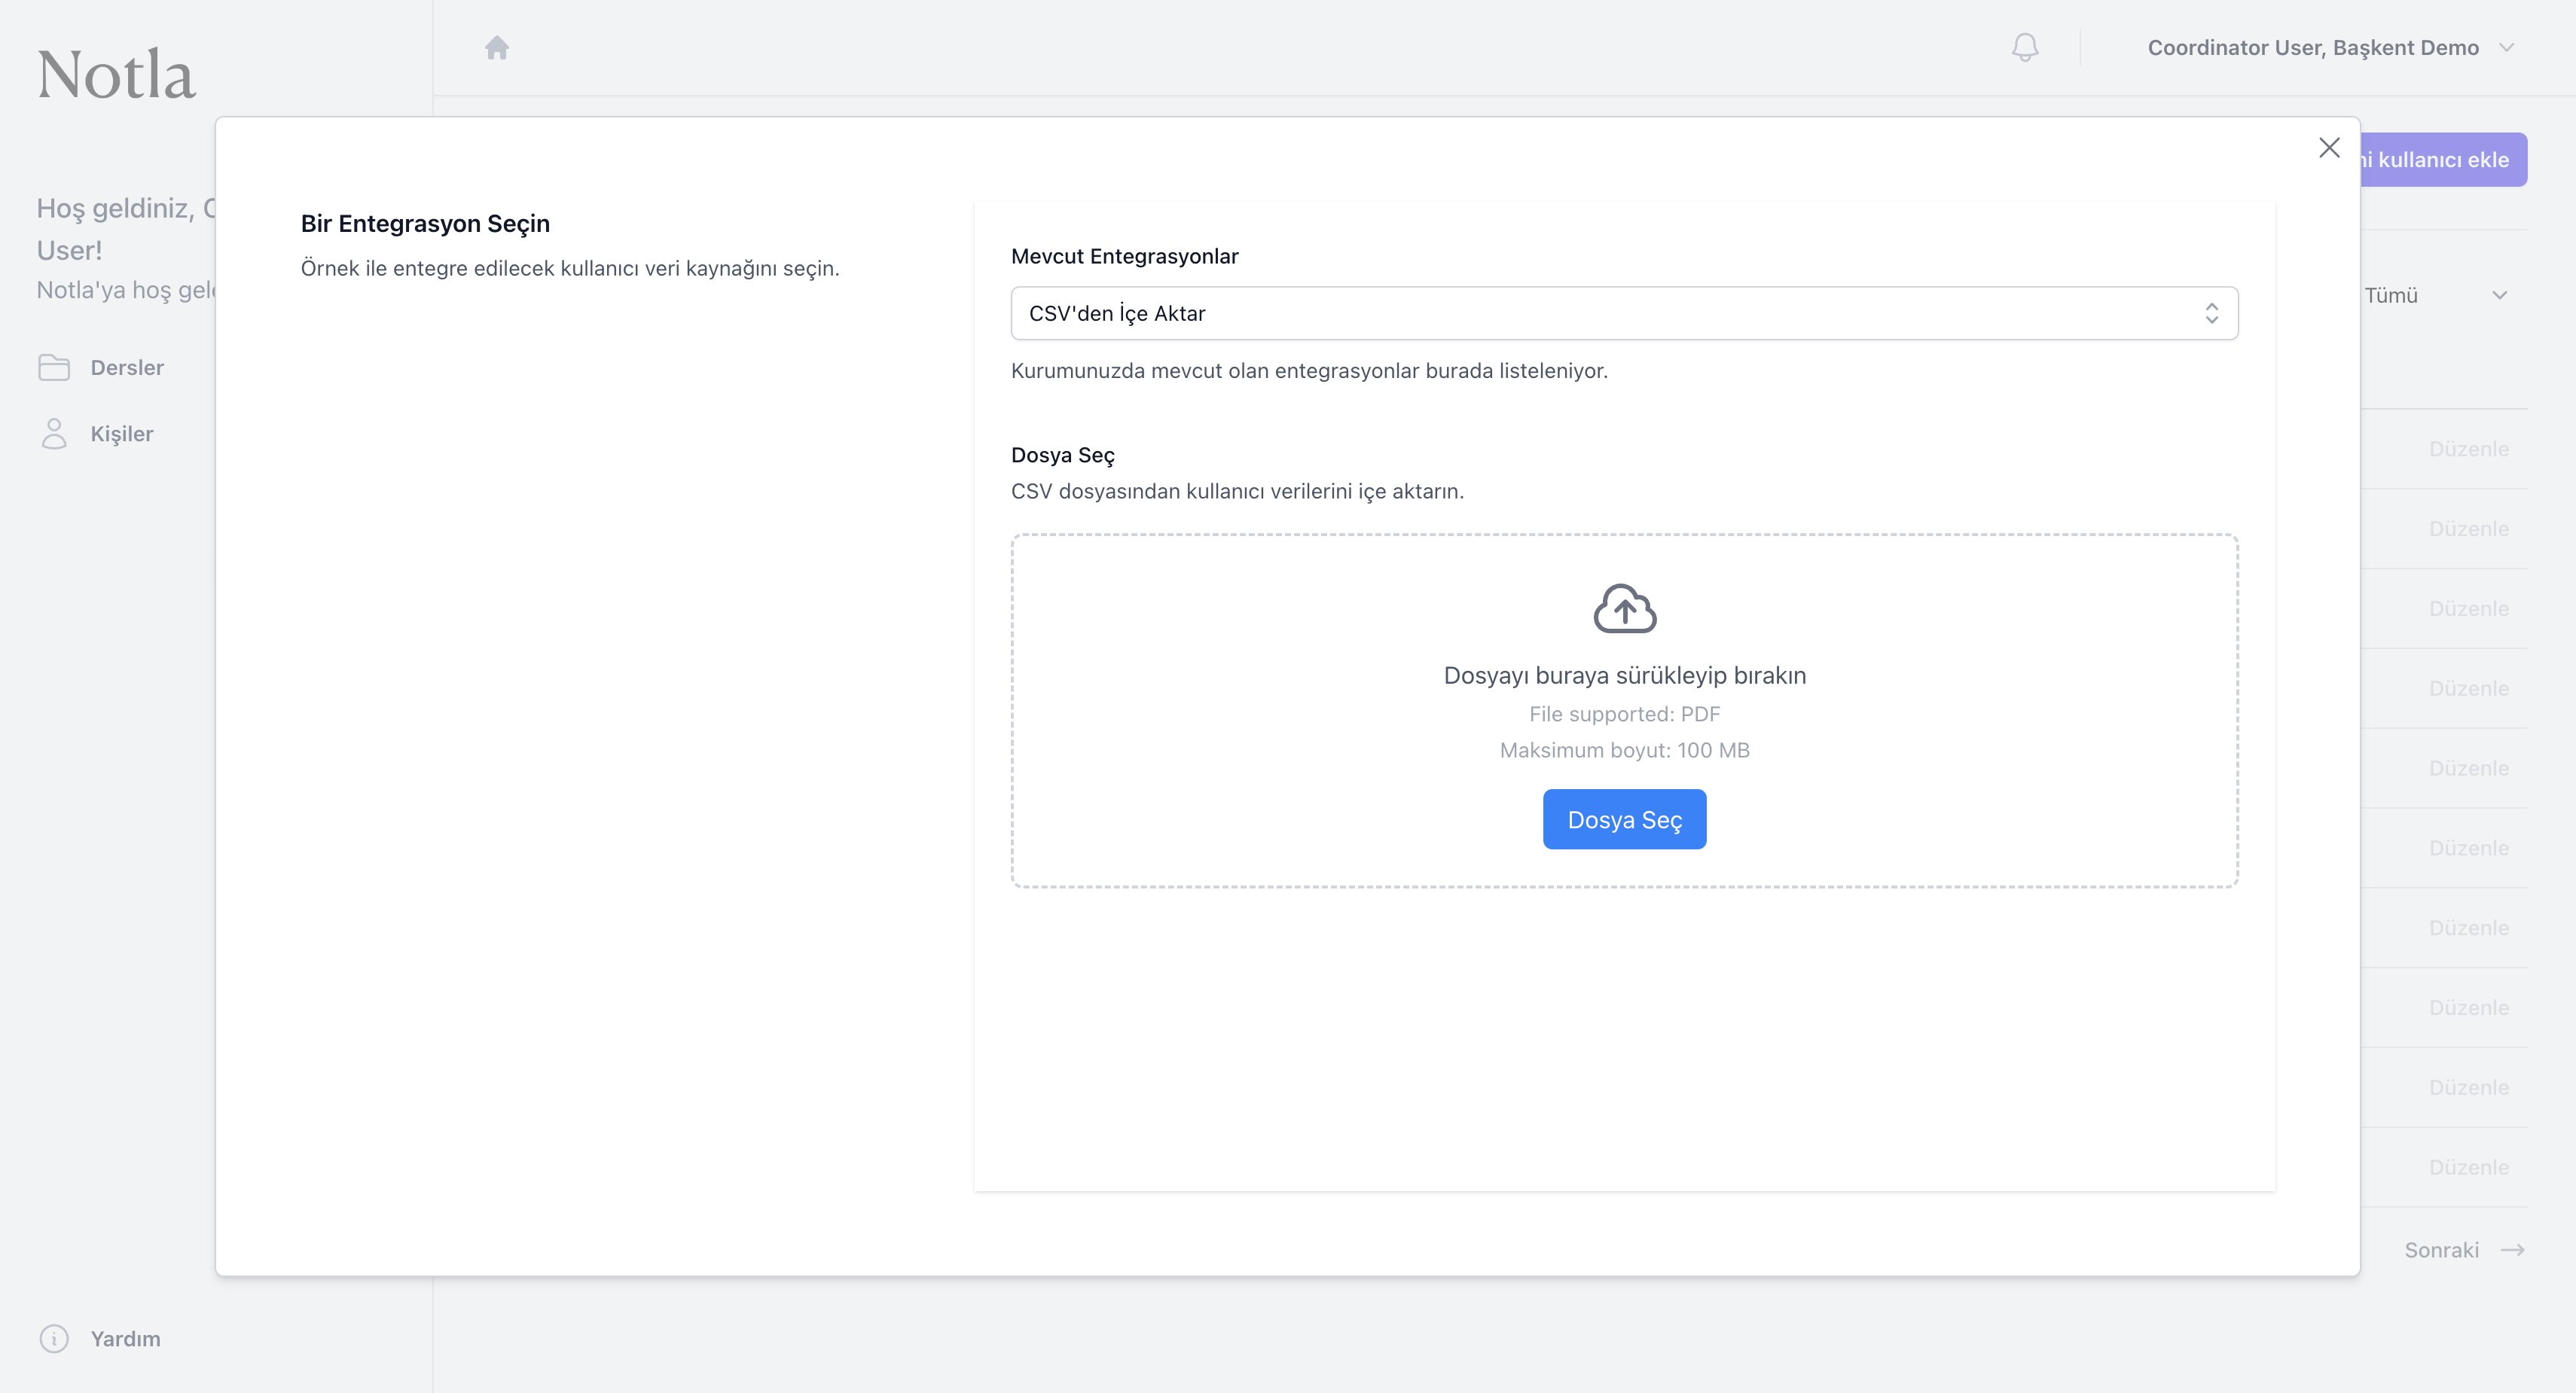
- Mevcut Entegrasyonlar açılır menüsü, kurumunuza tanımlı veri kaynaklarını listeler. Varsayılan olarak
CSV'den İçe Aktarseçeneği bulunur. - Dosya Seçalanına PDF'e kadar 100 MB boyutunda CSV dosyalarını sürükleyebilir veya tıklayarak seçebilirsiniz.
- CSV içe aktarımı tamamlandığında yeni kullanıcılar otomatik olarak Geçici olarak işaretlenir; davet e-postaları sonradan tek tek veya toplu olarak gönderilebilir.
CSV biçimi
Kullanıcıları düzenleme
Tablodaki herhangi bir satırın sağındaki Düzenle bağlantısı, o kullanıcının ad, e-posta ve kurum kimliği bilgilerini güncellemenize izin verir. Aynı pencereden bir kullanıcıyı koordinatöre yükseltebilir veya yetkilerini geri alabilirsiniz.
Bir kullanıcı sistemden silinmek isteniyorsa düzenleme penceresinin alt bölümündeki tehlike alanından kalıcı silme işlemi yapılabilir; bu işlem geri alınamaz.