
Notlandırma ve Sonuçlar
Öğrenci kağıtlarını yükleme
Taslak ve sayfa bölgeleri tamamlandıktan sonra sıra öğrenci kağıtlarını sisteme yüklemeye gelir. Notla iki yöntem sunar: web üzerinden doğrudan PDF yükleme veya Notla Tarayıcı mobil uygulamasıyla taranan kağıtların otomatik aktarımı. Yüklenen her kağıt, üzerindeki kimlik bölgesi okunarak ilgili öğrenciyle eşleştirilir.
Yüklemeleri Yönet
Sol menüdeki Yüklemeleri Yönet adımına geçtiğinizde iki sekmeli bir ekranla karşılaşırsınız:
- Öğrenciler — derse atanmış tüm öğrencilerin ödev/sınav durumunu satır satır gösterir.
- Taramalar — sisteme yüklenmiş ham PDF/JPG taramaları ve eşleştirme durumlarını listeler.
Sağ üstteki Taramaları Yükle düğmesi her iki sekmeden de erişilebilir ve yeni bir taramayı yüklemenizi sağlar.
Öğrenciler sekmesi
Öğrenciler sekmesi, ödev/sınava atanmış her öğrencinin gönderim durumunu gösterir. Henüz hiçbir kağıt yüklenmediyse her satırda 'Gönderim yok' görünür ve isim yanında turuncu uyarı simgesi yer alır.
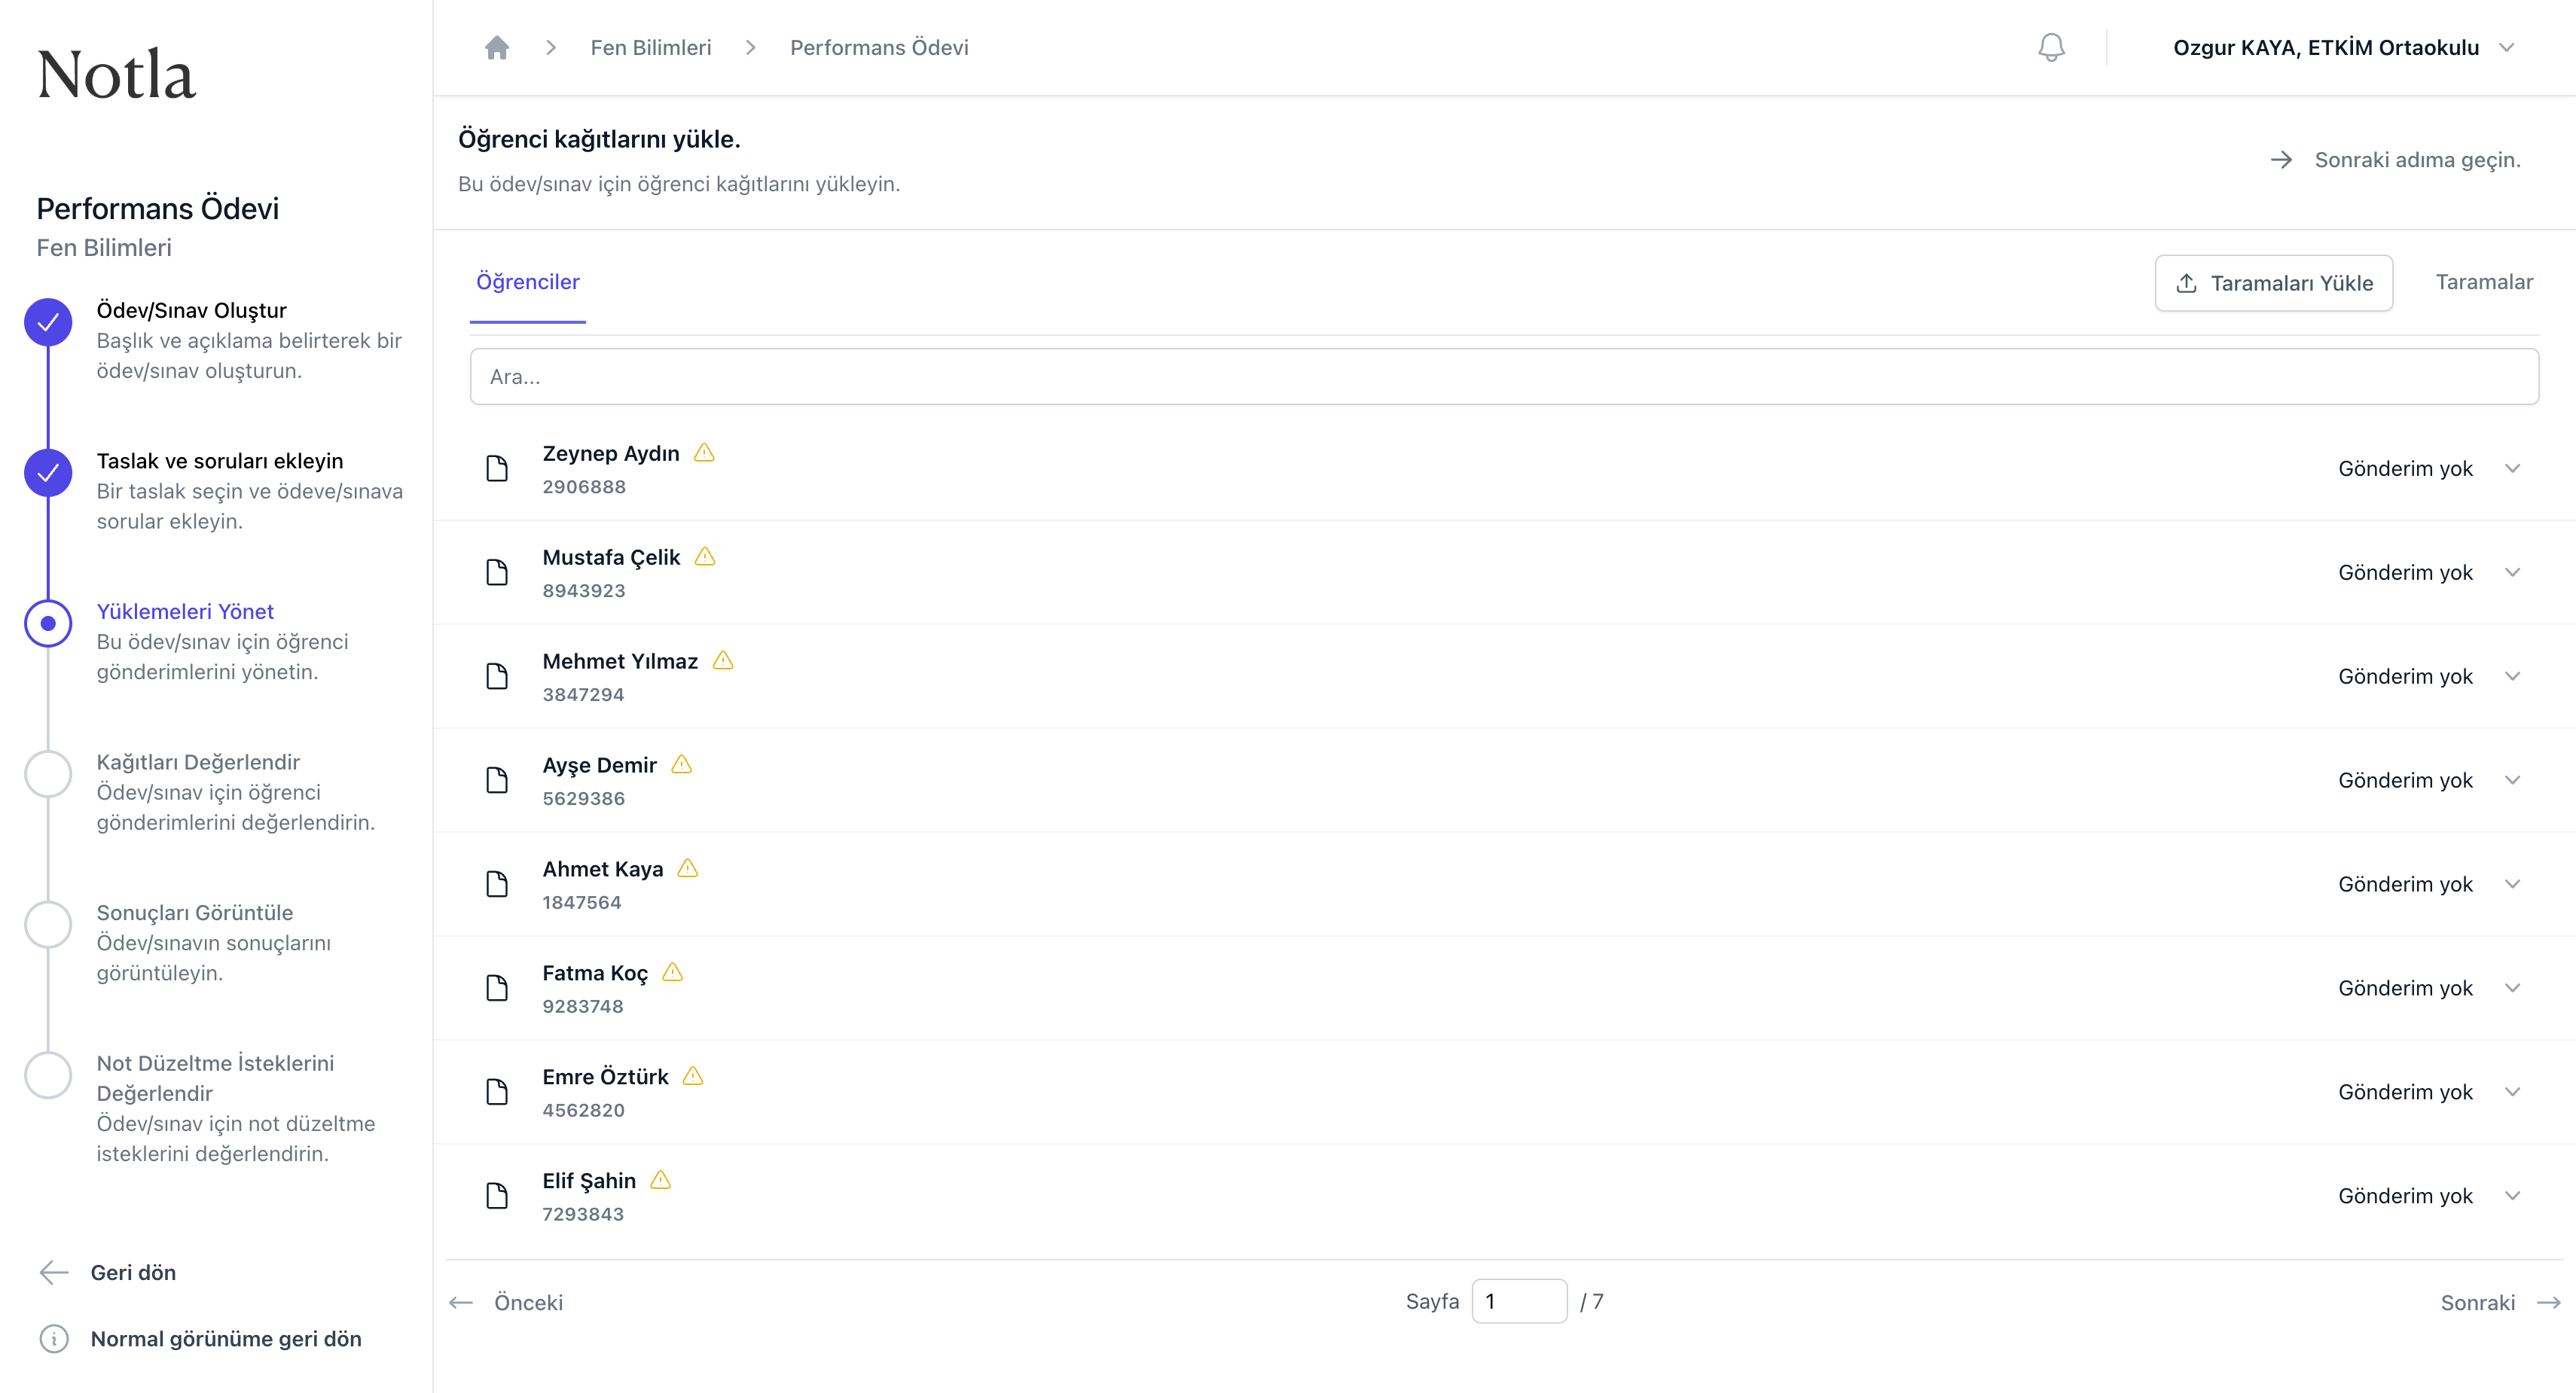
- Arama kutusu öğrenci adı veya numarasıyla filtreleme yapar; büyük sınıflarda hızlıca aradığınız kişiye ulaşmak için kullanışlıdır.
- Turuncu uyarı simgesi, o öğrencinin henüz bir kağıt yüklemediğini gösterir.
- Bir satırı tıkladığınızda o öğrencinin kağıdının ön izlemesi açılır; gönderim henüz yoksa yüklenmesi beklenir.
- Sayfanın alt kısmındaki sayfa numaralandırması büyük sınıflarda gezinmeyi kolaylaştırır.
Eşlemiş gönderimler
Bir tarama yüklenip işlendikten sonra her sayfa, üzerindeki kimlik bölgesi otomatik okunarak ilgili öğrencinin satırına eklenir. Eşlemenin başarısı; isim sütununda 'Mehmet Yılmaz - 3847294' gibi okunan adın küçük resim olarak gösterilmesiyle anlaşılır.
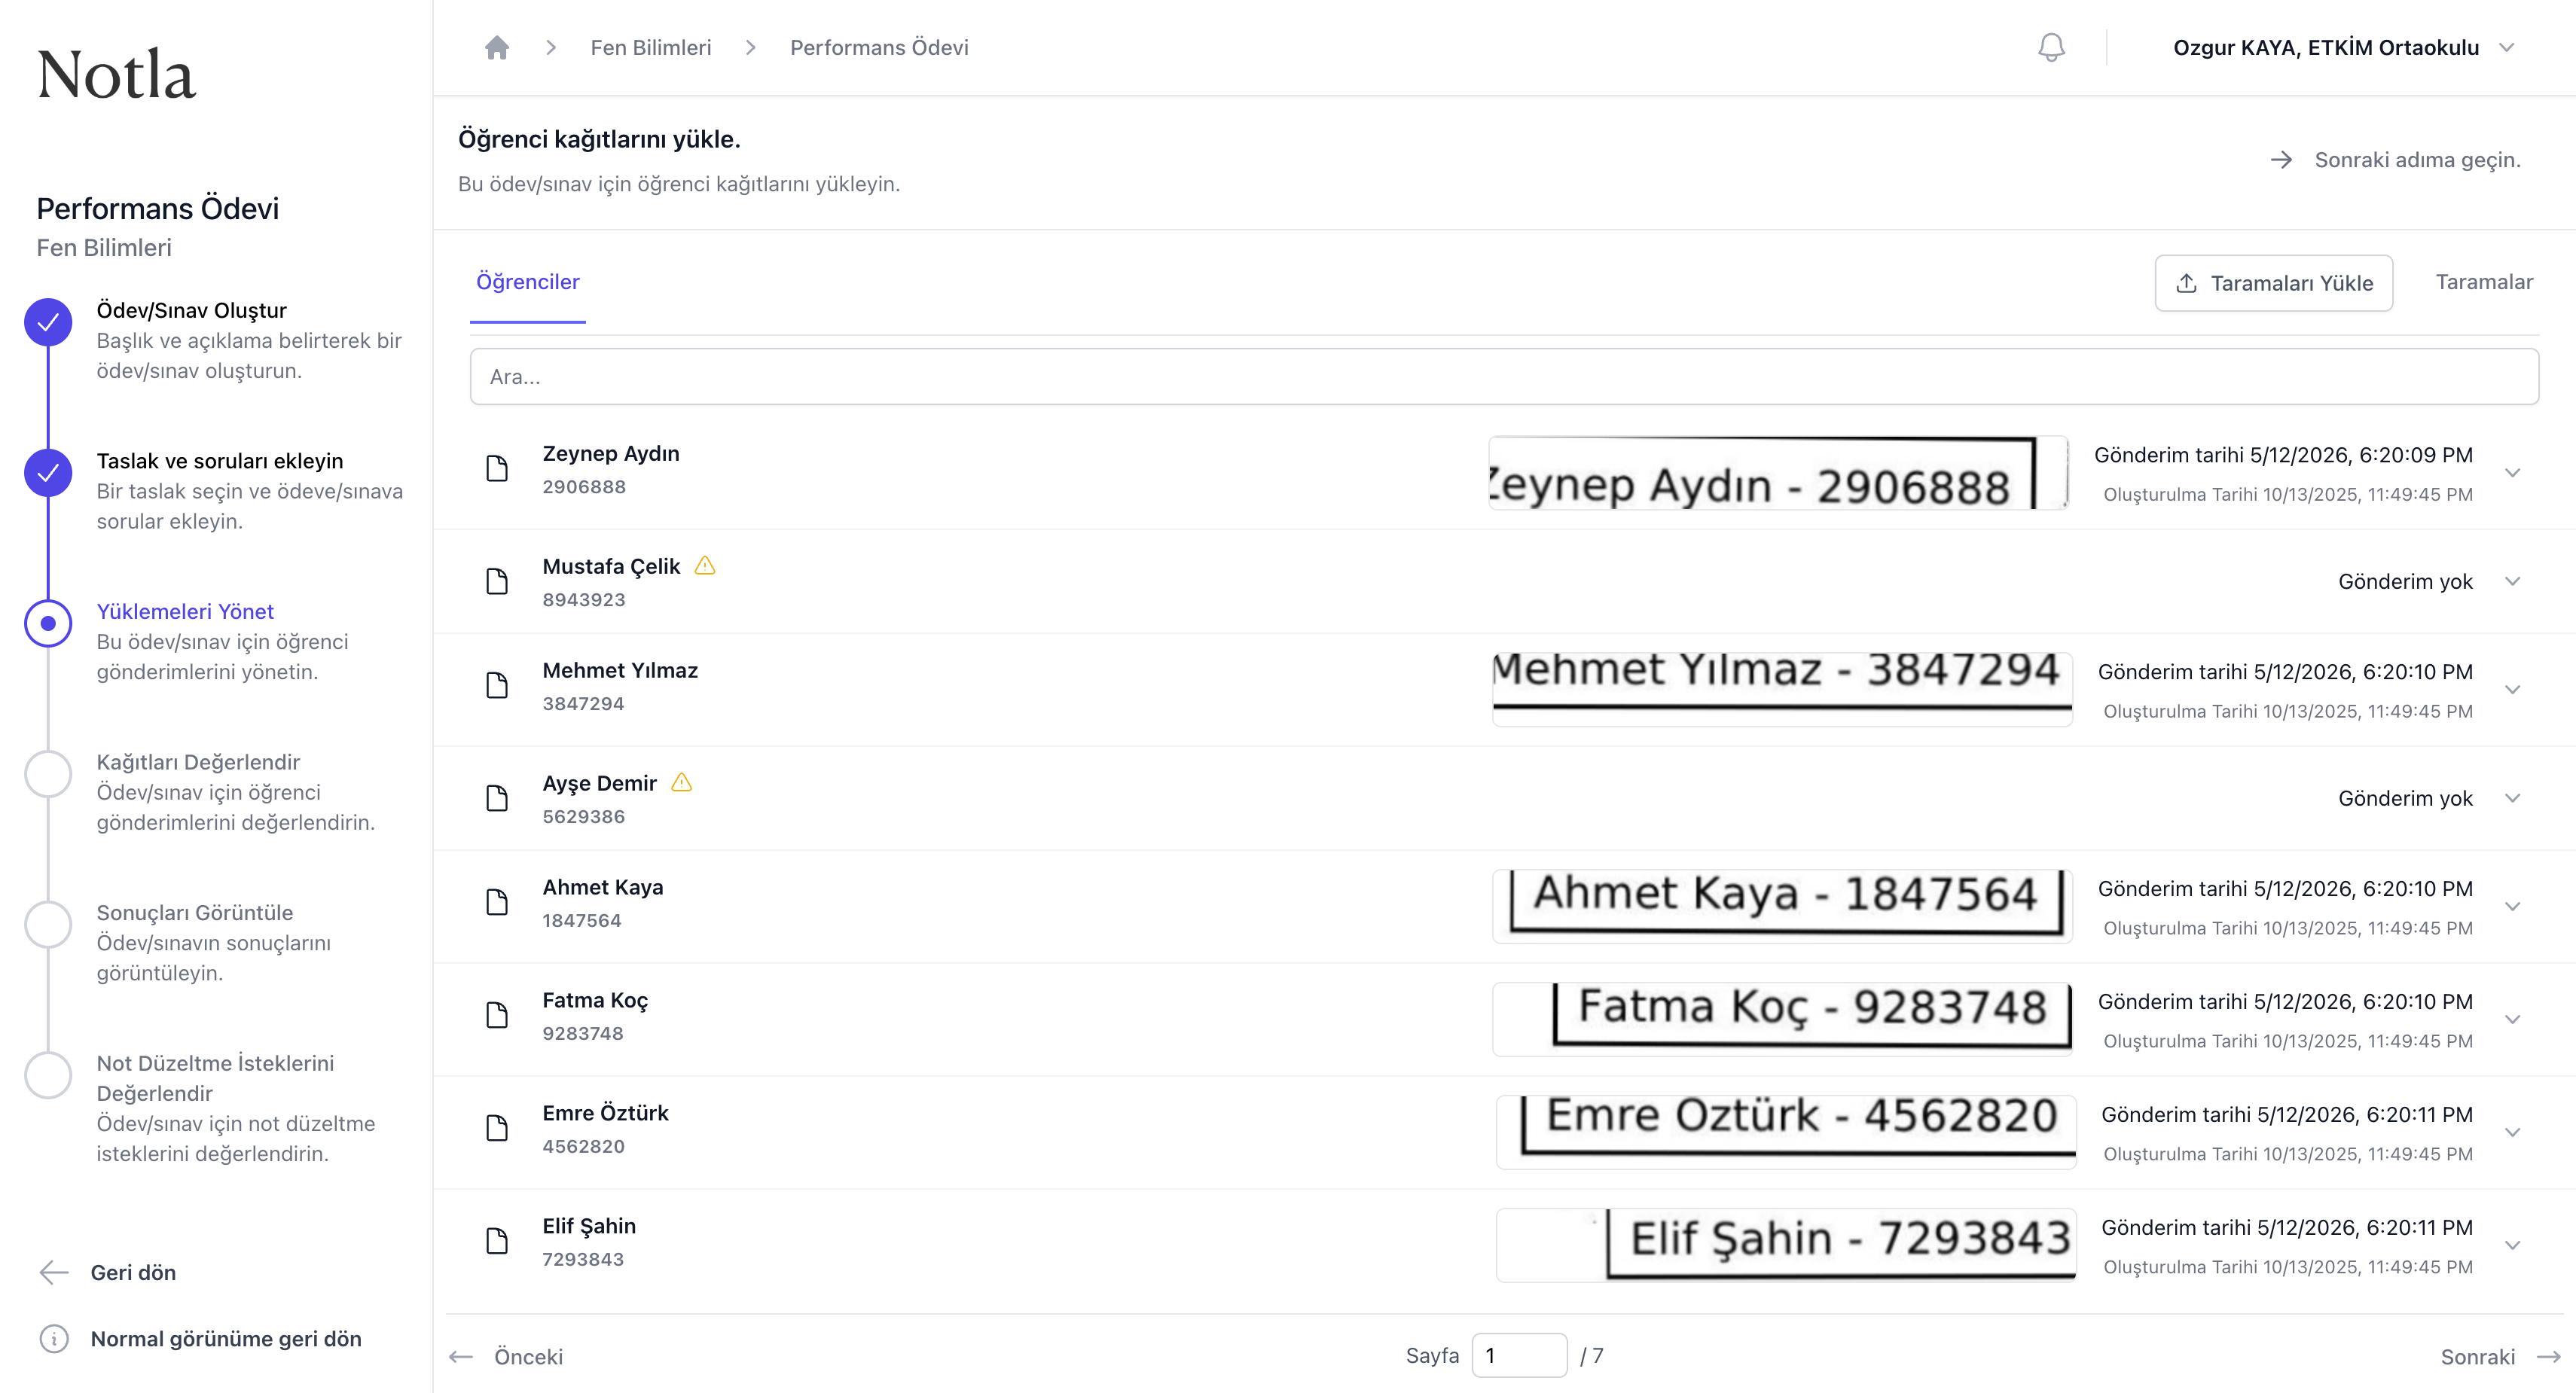
- Eşleşen öğrencilerde gönderim ve oluşturulma tarihleri sağda görünür.
- Kalan öğrencilerhâlâ "Gönderim yok" durumunda kalır; bu kağıtlar sonradan yüklendiğinde otomatik olarak doğru satıra düşer.
- Yanlış öğrenciye eşleşmiş bir kağıdı manuel olarak doğrultmak gerekirse, ilgili gönderimi tıklayıp Öğrenciyi değiştir seçeneğini kullanabilirsiniz.
Taramalar sekmesi — boş
Taramalar sekmesi yüklediğiniz dosyaların ham listesini gösterir. Henüz bir tarama yüklenmediyse 'Tarama yok.' mesajı görünür.
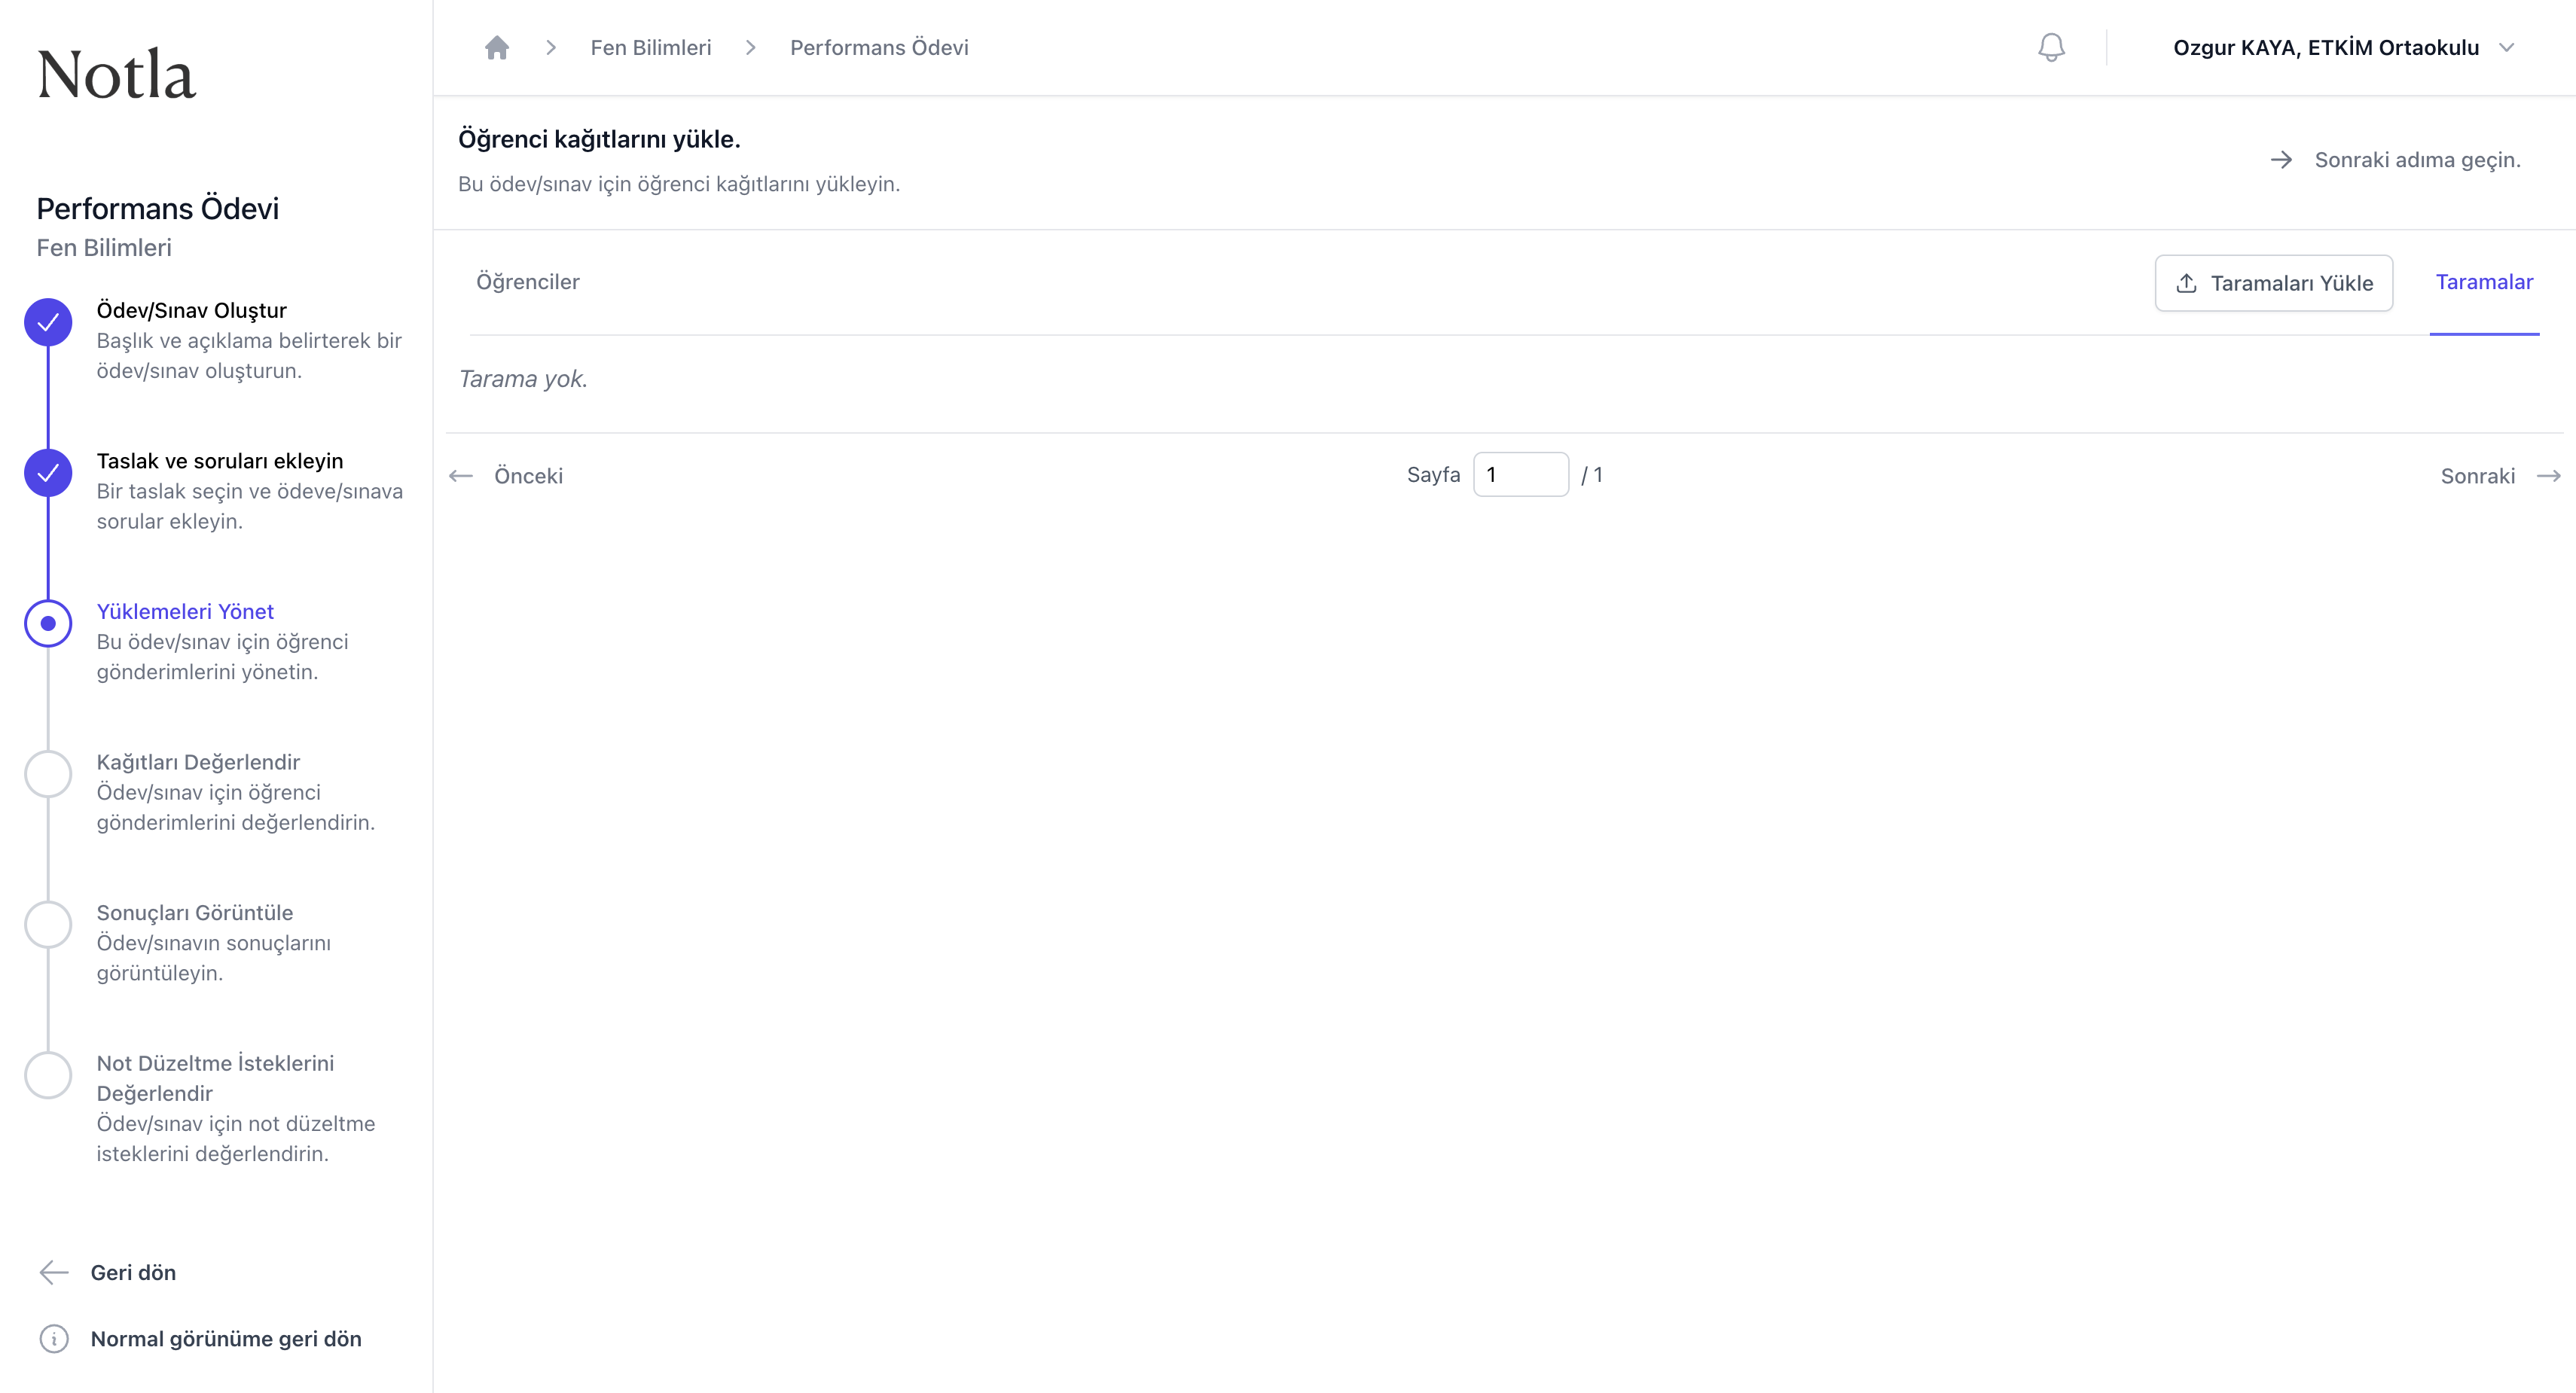
- Bu sekme, bir taramanın hangi dosyadan geldiğini ve hangi kullanıcının yüklediğini gösterir.
- Taramaları Yükle düğmesi yeni bir PDF yükleme dialogunu açar.
Taramalar sekmesi — tamamlanmış tarama
Bir tarama yüklenip işleme bitirilince satırın sağında 'Tamamlandı' rozeti görünür. Detayları açtığınızda kaç sayfanın başarılı eşleştiği, kaç sayfanın hâlâ eşleşme beklediği ve atanmamış kitapçık veya gevşek sayfa olup olmadığı görüntülenir.
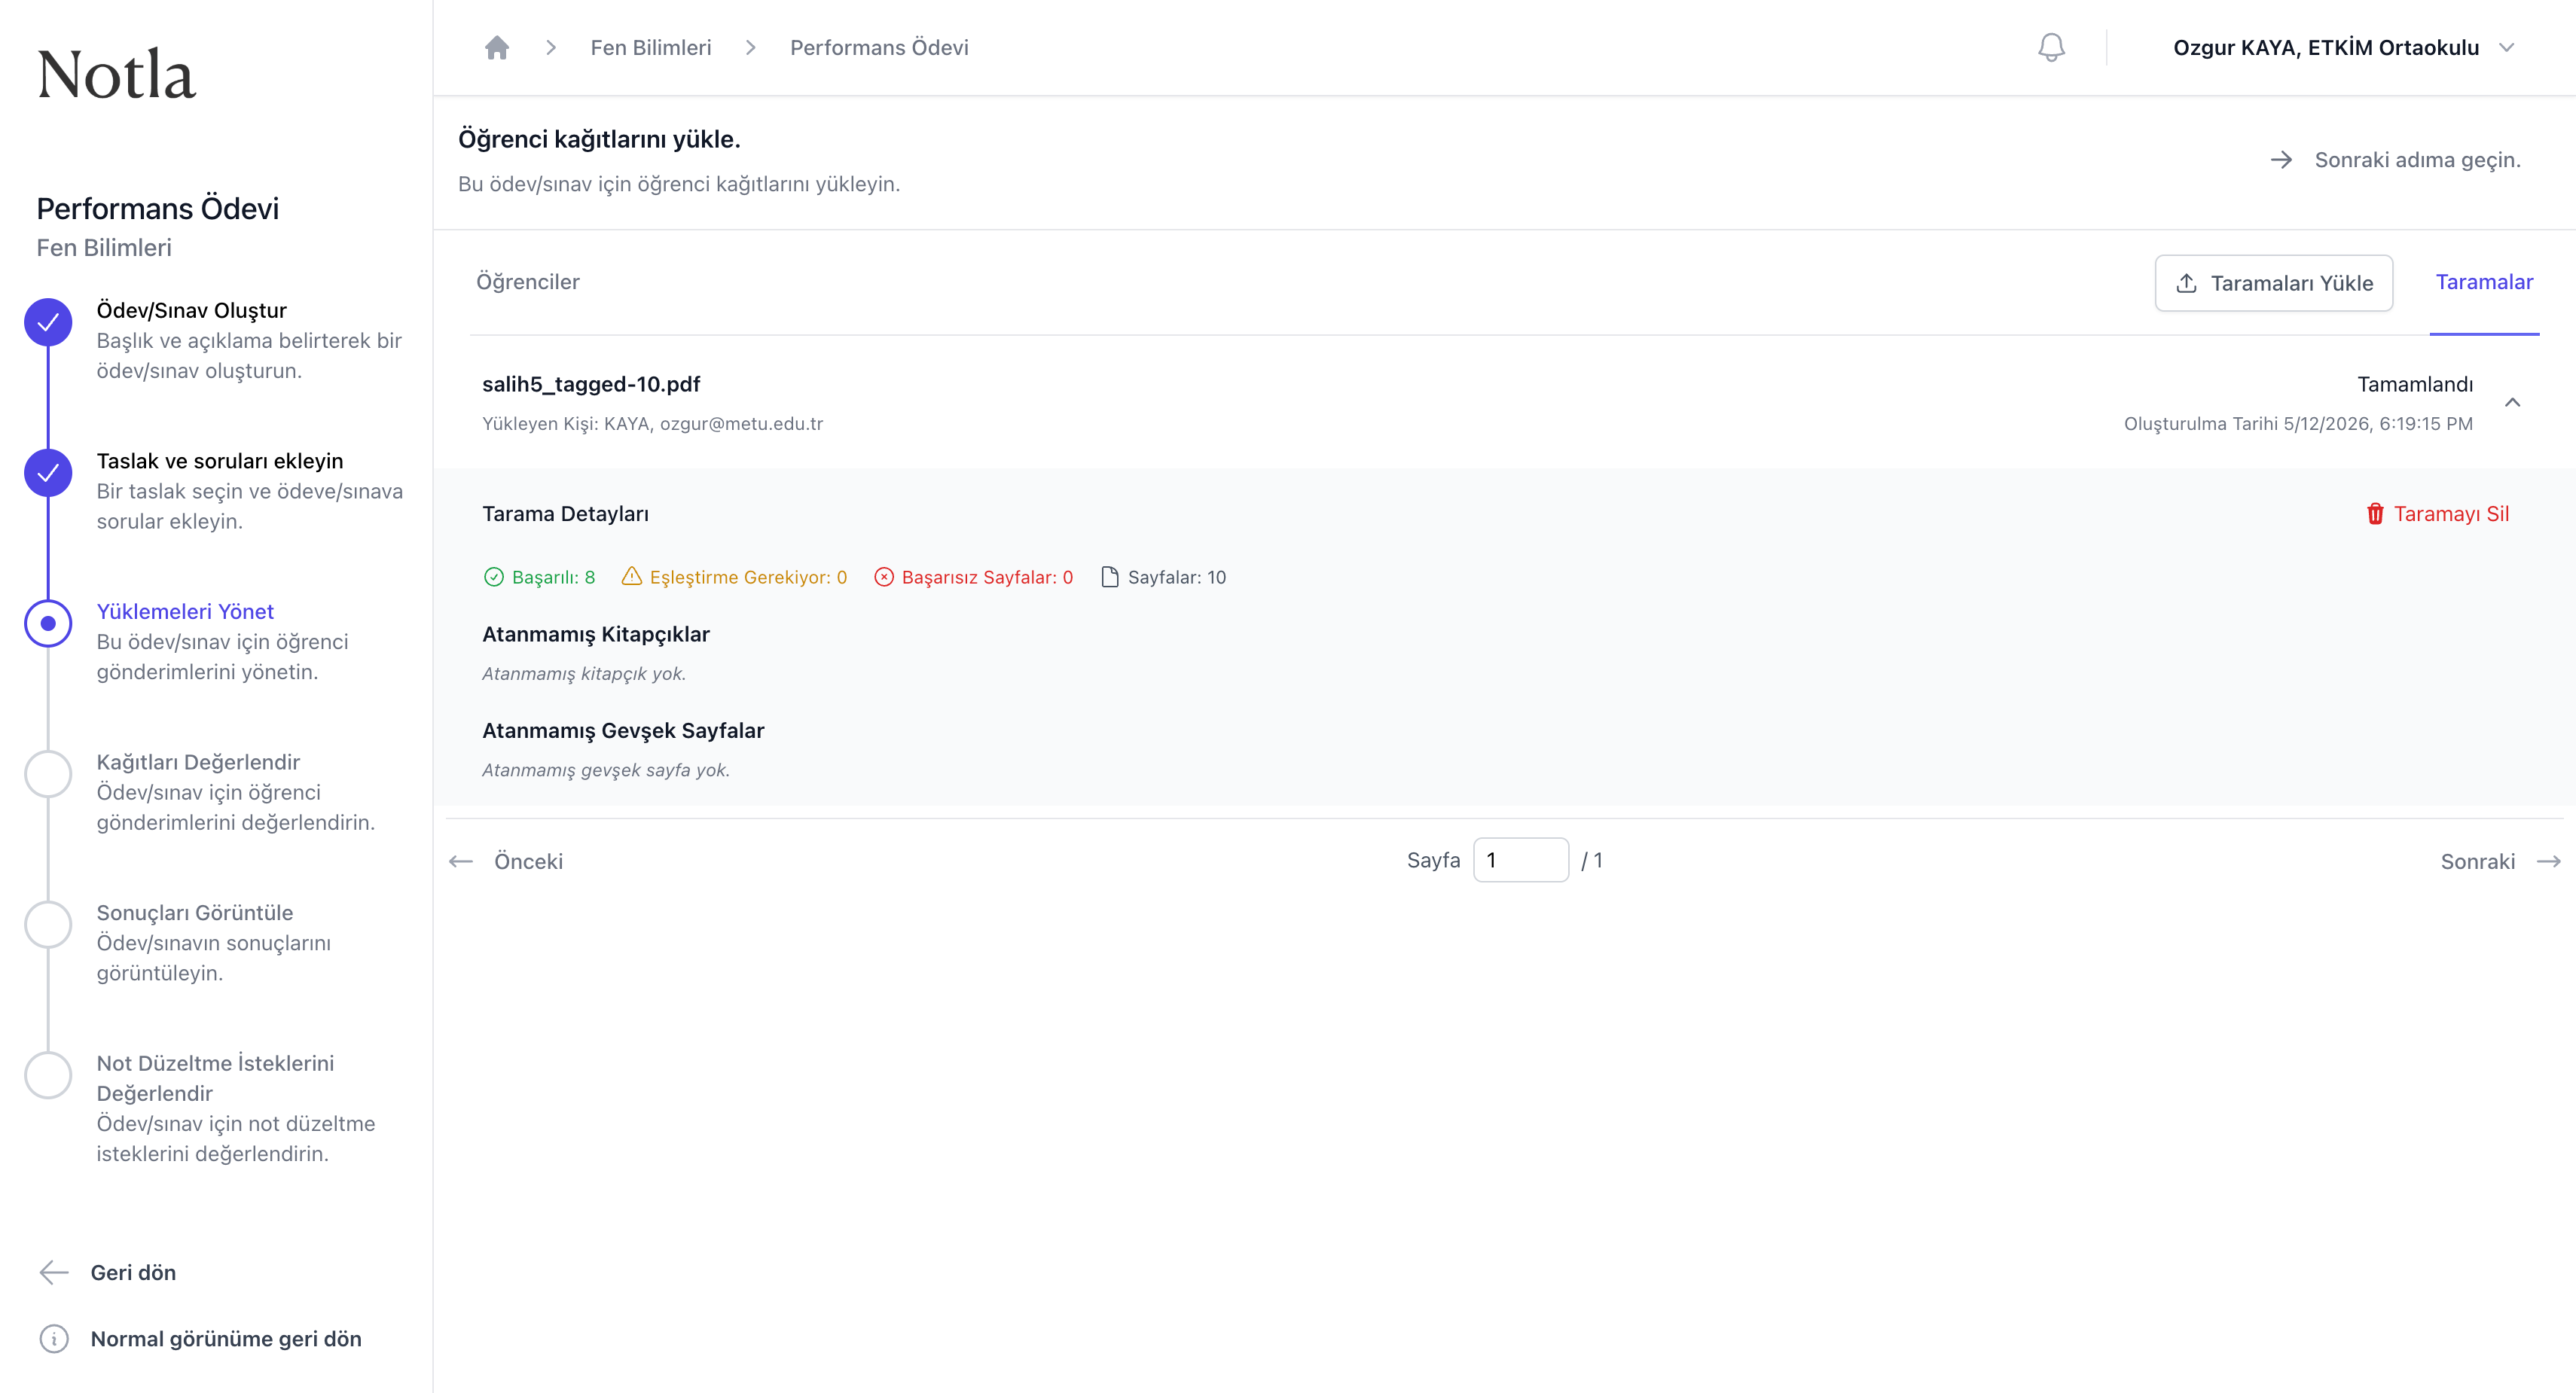
- Başarılı: kimlik okunup ilgili öğrenciye eşlenen sayfa sayısı.
- Eşleştirme Gerekiyor: kimlik okunamadığı için manuel eşleme bekleyen sayfalar.
- Başarısız Sayfalar: tarama kalitesi yetersiz olduğu veya kimlik bölgesi bulunamadığı için eşlenemeyen sayfalar.
- Atanmamış Kitapçık / Gevşek Sayfa: hangi öğrenciye ait olduğu belirlenemeyen kitapçıklar veya tek sayfalar; bunları manuel olarak ilgili öğrenciye atayabilirsiniz.
- Taramayı Sil, dosyanın tüm sayfalarıyla birlikte sistemden tamamen silinmesini sağlar.
Web üzerinden PDF yükleme
Taramaları Yükle düğmesi açtığı dialog ile bilgisayarınızdan doğrudan PDF dosyalarını sürükleyip bırakabilirsiniz. Sınır 100 MB'tır. Aynı dialogun alt sol köşesinde Notla Tarayıcı mobil uygulaması seçeneği de yer alır.
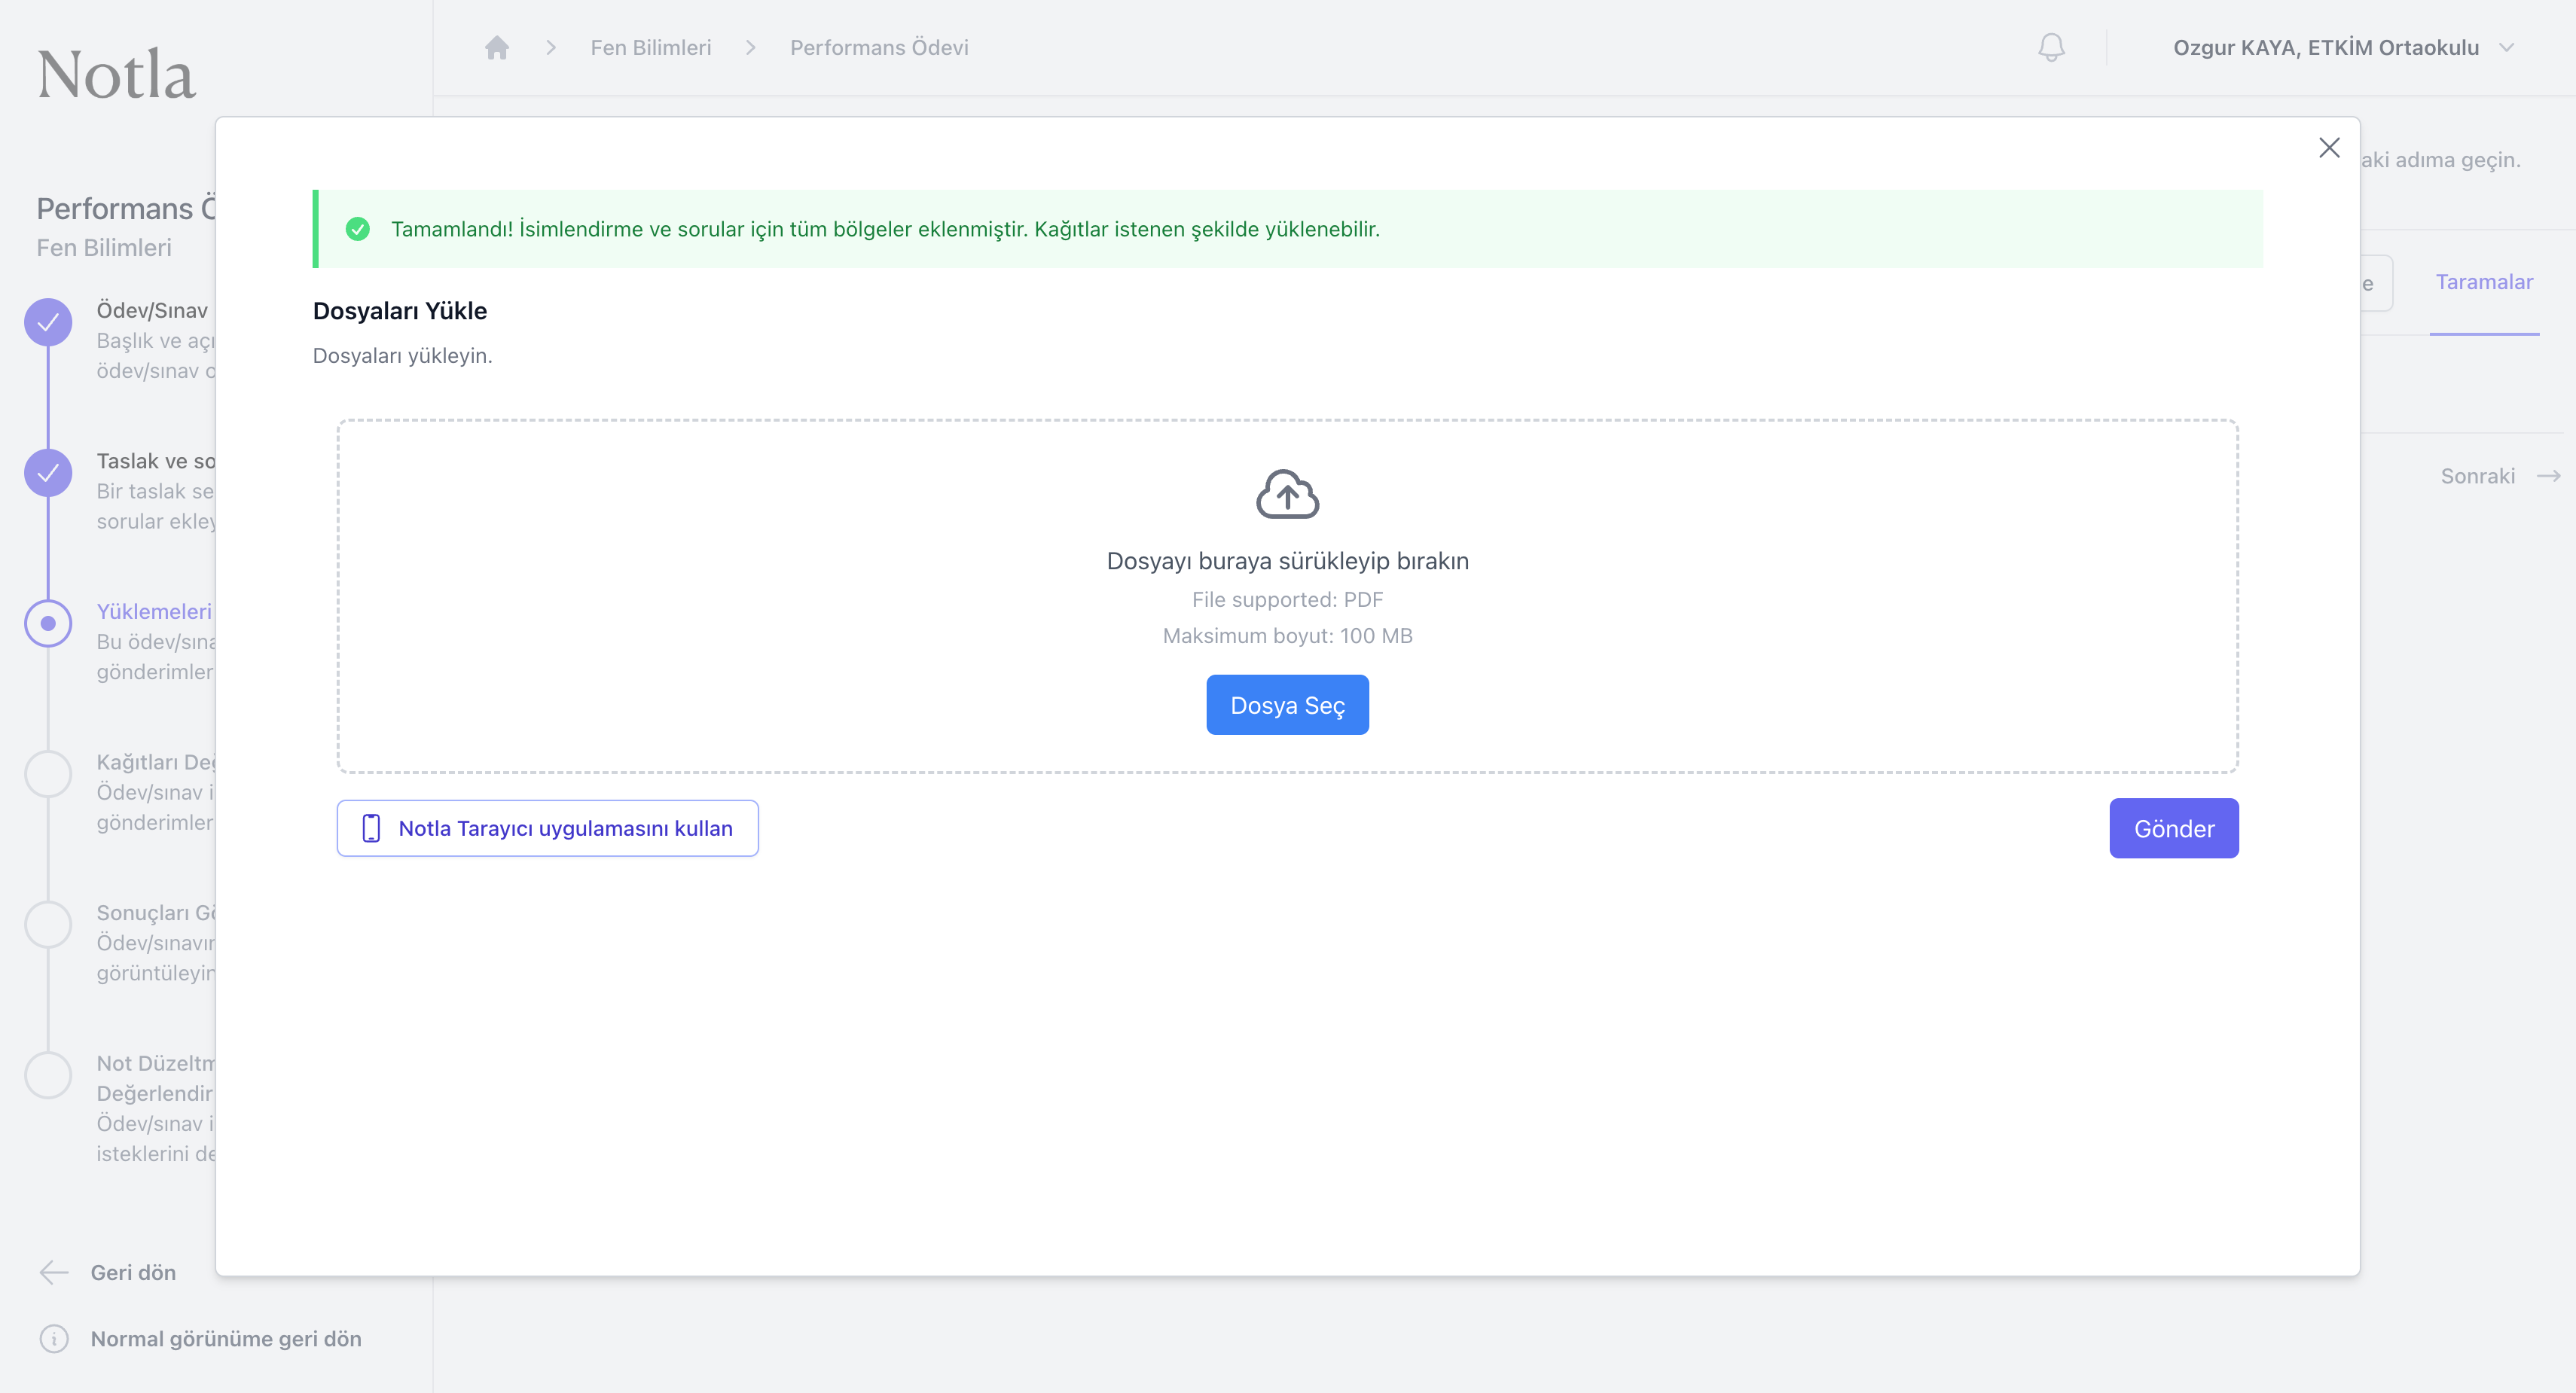
- Dialogun üstündeki yeşil bildirim, sayfa bölgelerinin tamamlanmış olduğunu doğrular; bu bildirim olmadan kağıt yüklemek anlamlı sonuç vermeyebilir.
- Dosya Seç düğmesi yerel diskten dosya seçer; sürükle-bırak da desteklenir.
- Sol altta yer alan Notla Tarayıcı uygulamasını kullan düğmesi, mobil tarama akışına geçiş için kullanılır.
Yüklenecek PDF seçildikten sonra
Bir veya birden fazla PDF dosyası eklendiğinde dialogun altında 'Dosyalar' bölümü çıkar ve her dosya silme simgesiyle birlikte listelenir. 'Gönder' düğmesi aktif hale gelir.
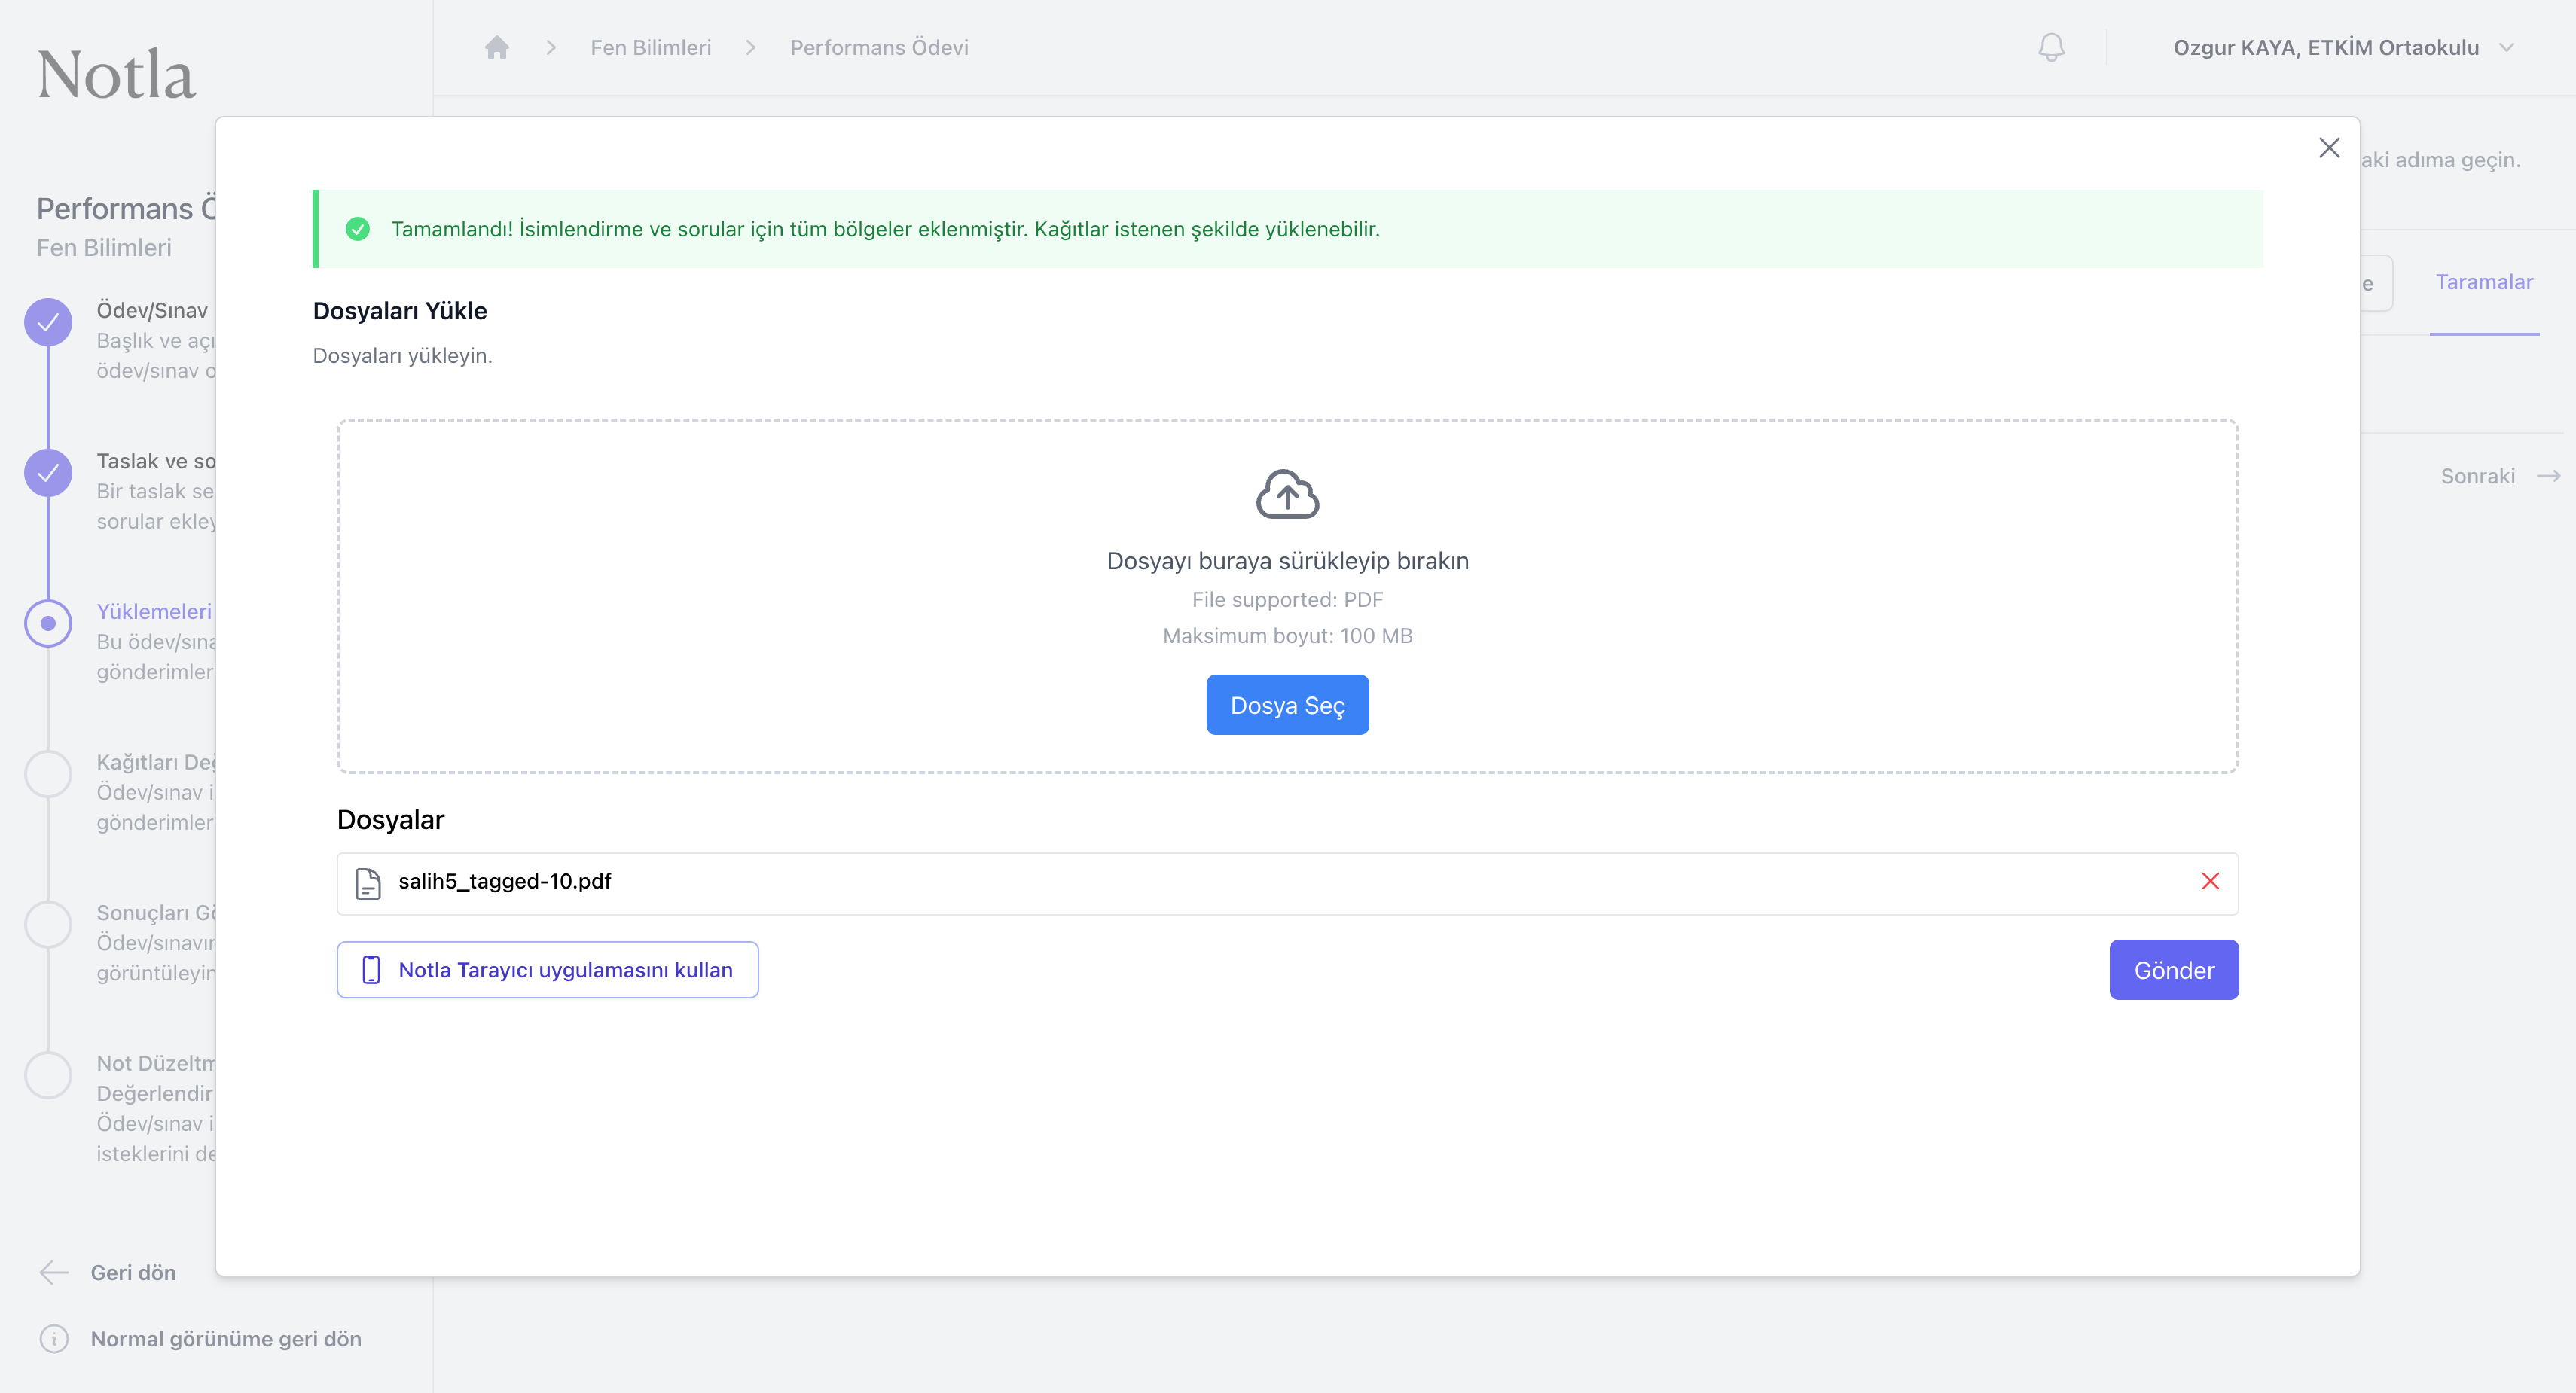
- Birden fazla dosyayı aynı anda yüklemek için art arda sürükleyip bırakın; hepsi tek bir Gönder işlemiyle gönderilir.
- Yanlış eklenmiş bir dosyayı sağdaki kırmızı
×simgesiyle listeden çıkarabilirsiniz. - Gönder düğmesi yüklemeyi başlatır; sonra dialog kapanır ve dosya Taramalar sekmesinde işleme alınmış olarak görünür.
Notla Tarayıcı ile yükleme
Telefonla tarama yapmak için yükleme dialogundaki 'Notla Tarayıcı uygulamasını kullan' düğmesine basın. Açılan ekran iki kısa adımı özetler: uygulamayı açın, ödevi seçip sayfaları tarayın. Tarama biter bitmez 'Yükleme tamamlandı mı?' düğmesine dönün.
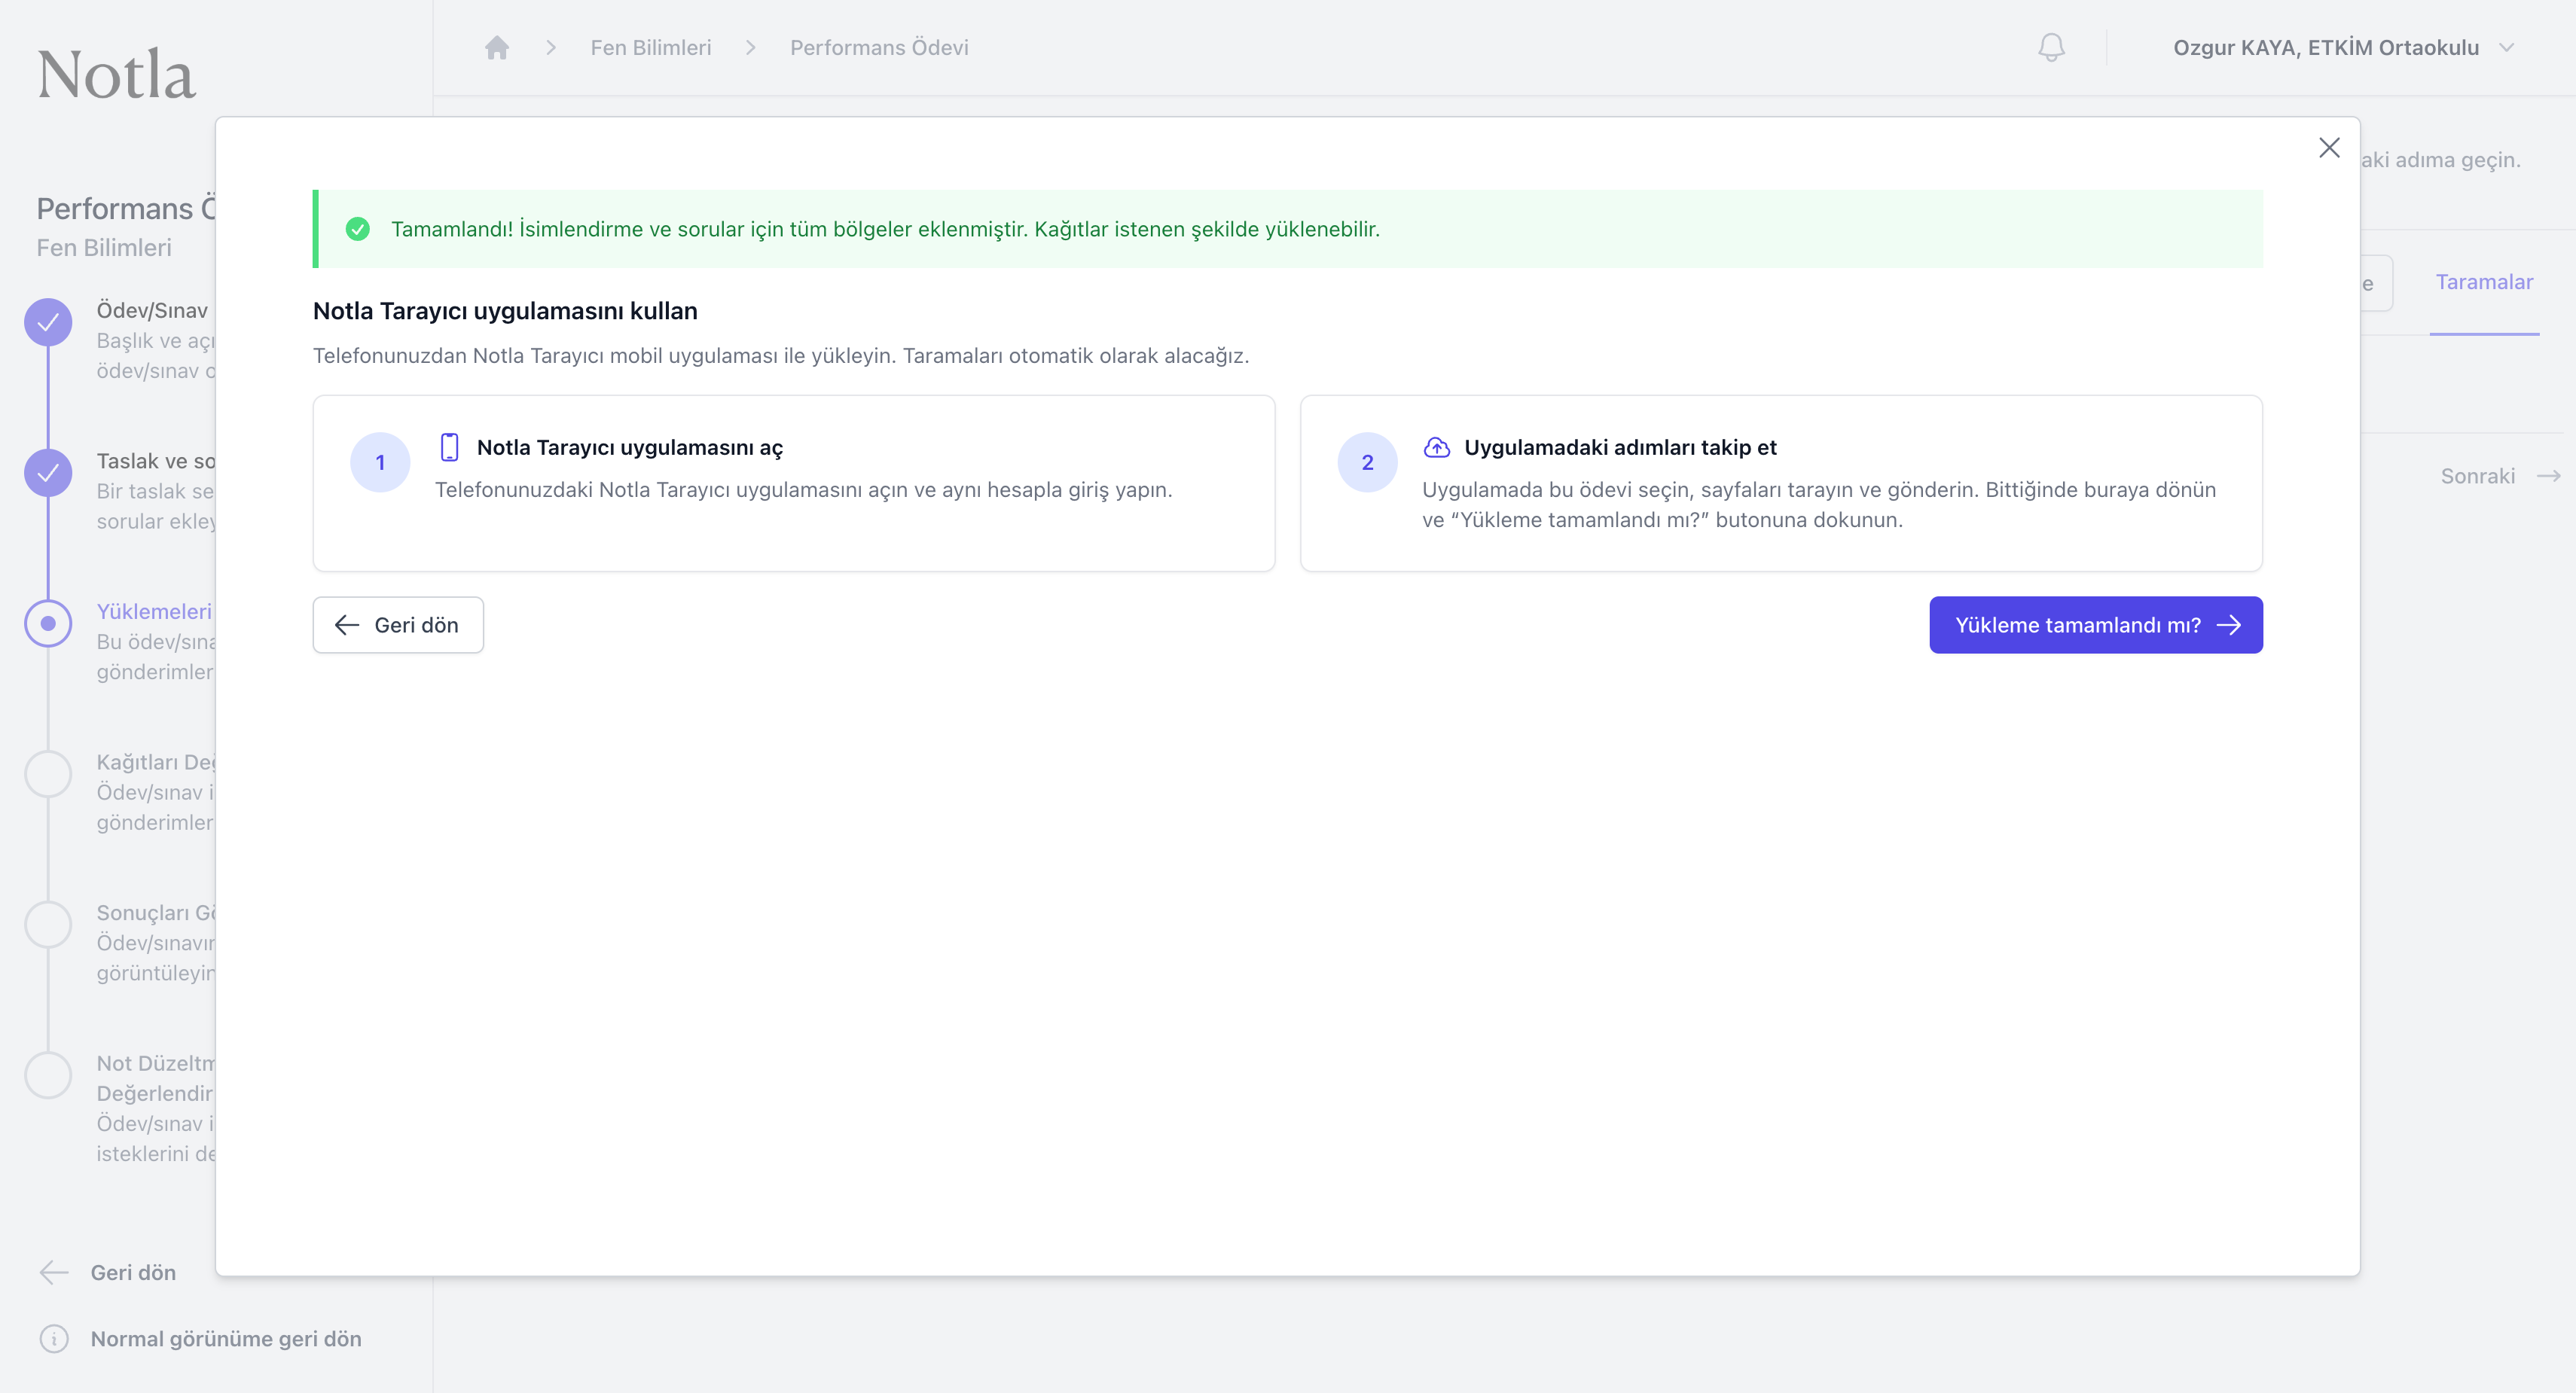
- Telefonunuzdaki Notla Tarayıcı uygulamasını açıp aynı hesabınızla giriş yapın. Uygulama otomatik olarak aktif ödev/sınavları listeler.
- Uygulamadan ilgili ödev/sınavı seçin, kağıtları sırayla tarayın ve Gönder'e basın. Taramalar bulutta işlenip web arayüzüne otomatik düşer.
- Web'de Yükleme tamamlandı mı? düğmesine bastığınızda dialog kapanır ve Taramalar sekmesi tazelenir.
- Mobil uygulama hakkında daha fazla bilgi için Notla Tarayıcı bölümüne göz atın.
İşleme durumları
Yüklenen bir tarama önce 'Tamamlanması bekleniyor' durumunda görünür; arka planda her sayfa OCR ve eşleme adımlarından geçer. İşleme bittikten sonra durumu 'Tamamlandı' olur.
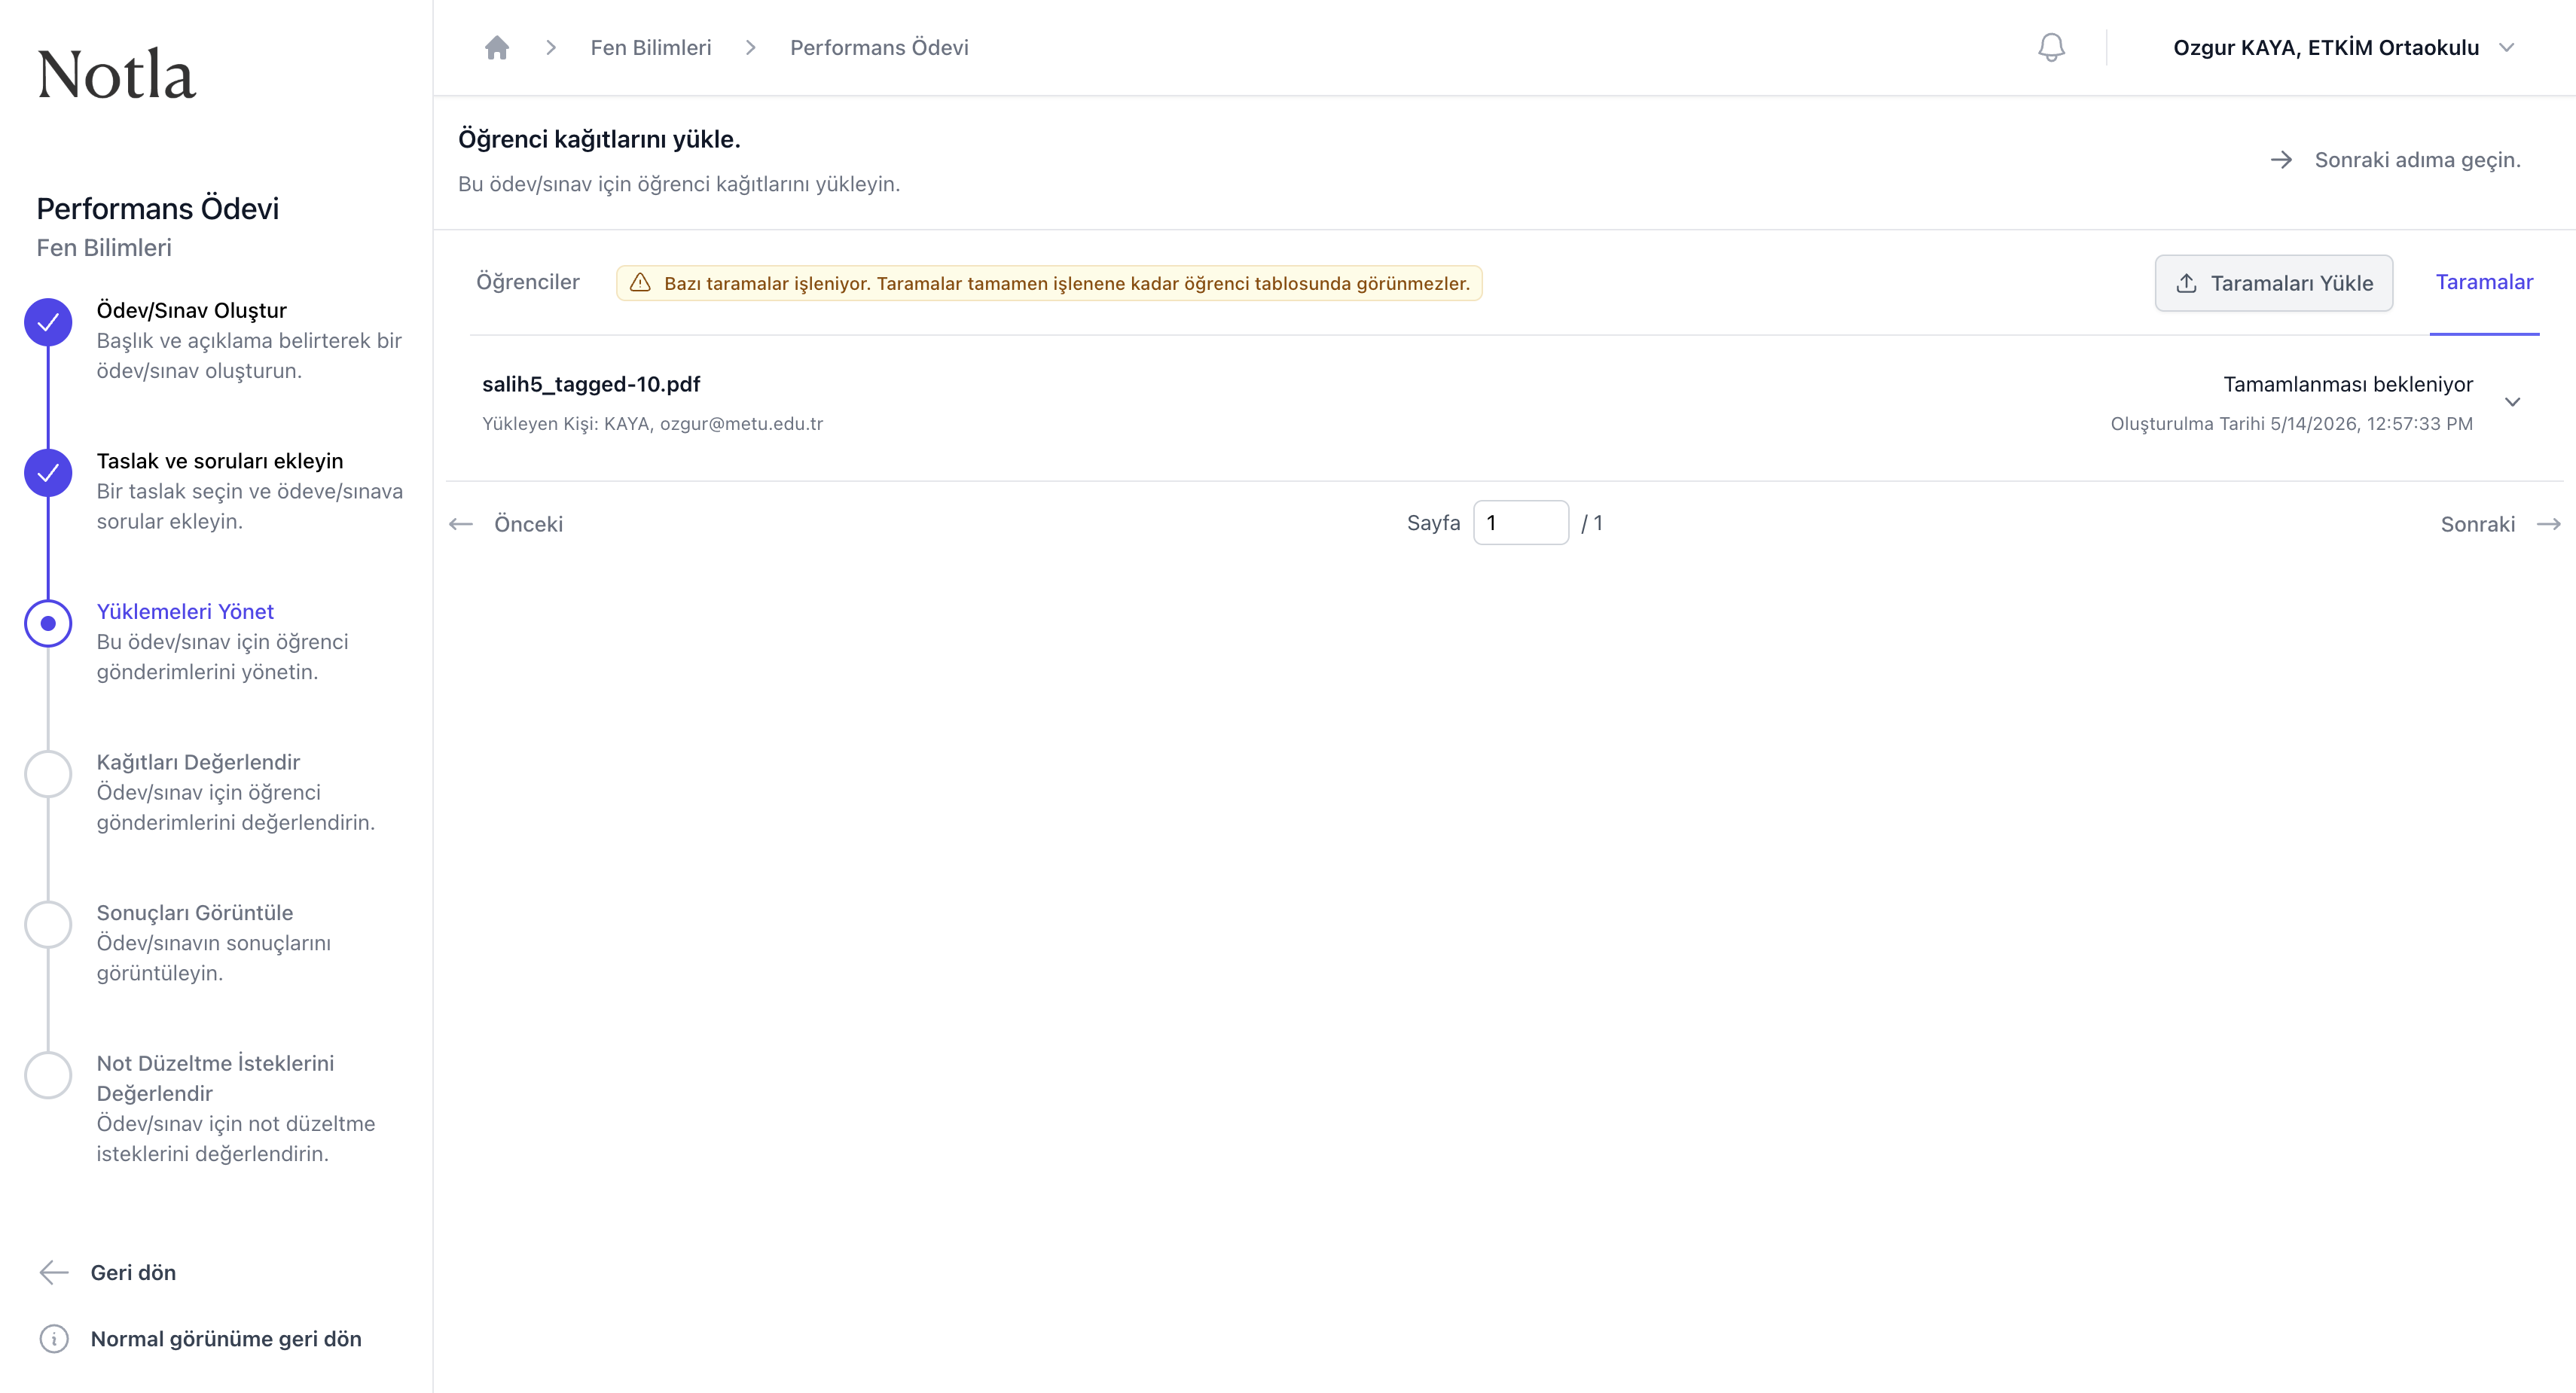
- Bazı taramalar işleniyor. uyarısı, sayfaların henüz Öğrenciler sekmesinde görünmediğini hatırlatır.
- İşleme süresi sayfa sayısına ve tarama kalitesine göre değişir; çoğunlukla birkaç dakikadır.
- Tamamlandı rozeti görüntülendiğinde taramanın detaylarına bakıp olası eşleme sorunlarını çözebilirsiniz.
Eşlenememiş sayfalar
Sonraki adım
Tüm öğrenci kağıtları yüklenip eşlendikten sonra sıra otomatik notlandırma ayarlarını gözden geçirip değerlendirmeyi başlatmaya gelir. Sol menüdeki Kağıtları Değerlendir adımına geçin veya Otomatik notlandırma ayarları bölümüne ilerleyin.