
Kullanıcı ve Ders Yönetimi
Ders oluşturma
Yeni bir ders, üç adımlı bir sihirbaz aracılığıyla oluşturulur: önce dersin temel bilgileri girilir, ardından bir veya birden çok öğretmen atanır ve son olarak derse kayıtlı öğrenciler seçilir. Her adım otomatik olarak kaydedilir; ortada bırakırsanız sonradan kaldığınız yerden devam edebilirsiniz.
Genel bakış
Ders oluşturma sihirbazını başlatmak için Dersler sayfasındaki Yeni ders ekle kartına tıklayın. Açılan dialog üst kısmında üç adımlık ilerleme çubuğunu görürsünüz: Ders oluştur, Öğretmen ekle, Öğrencileri kaydet.
Önce kullanıcılarınızı ekleyin
Adım 1 — Ders bilgileri
İlk adımda dersin adını ve kısa bir açıklamasını girin. Bu bilgiler hem koordinatörlerin gördüğü ders kartında hem de derse kayıtlı kullanıcıların listesinde görünür.
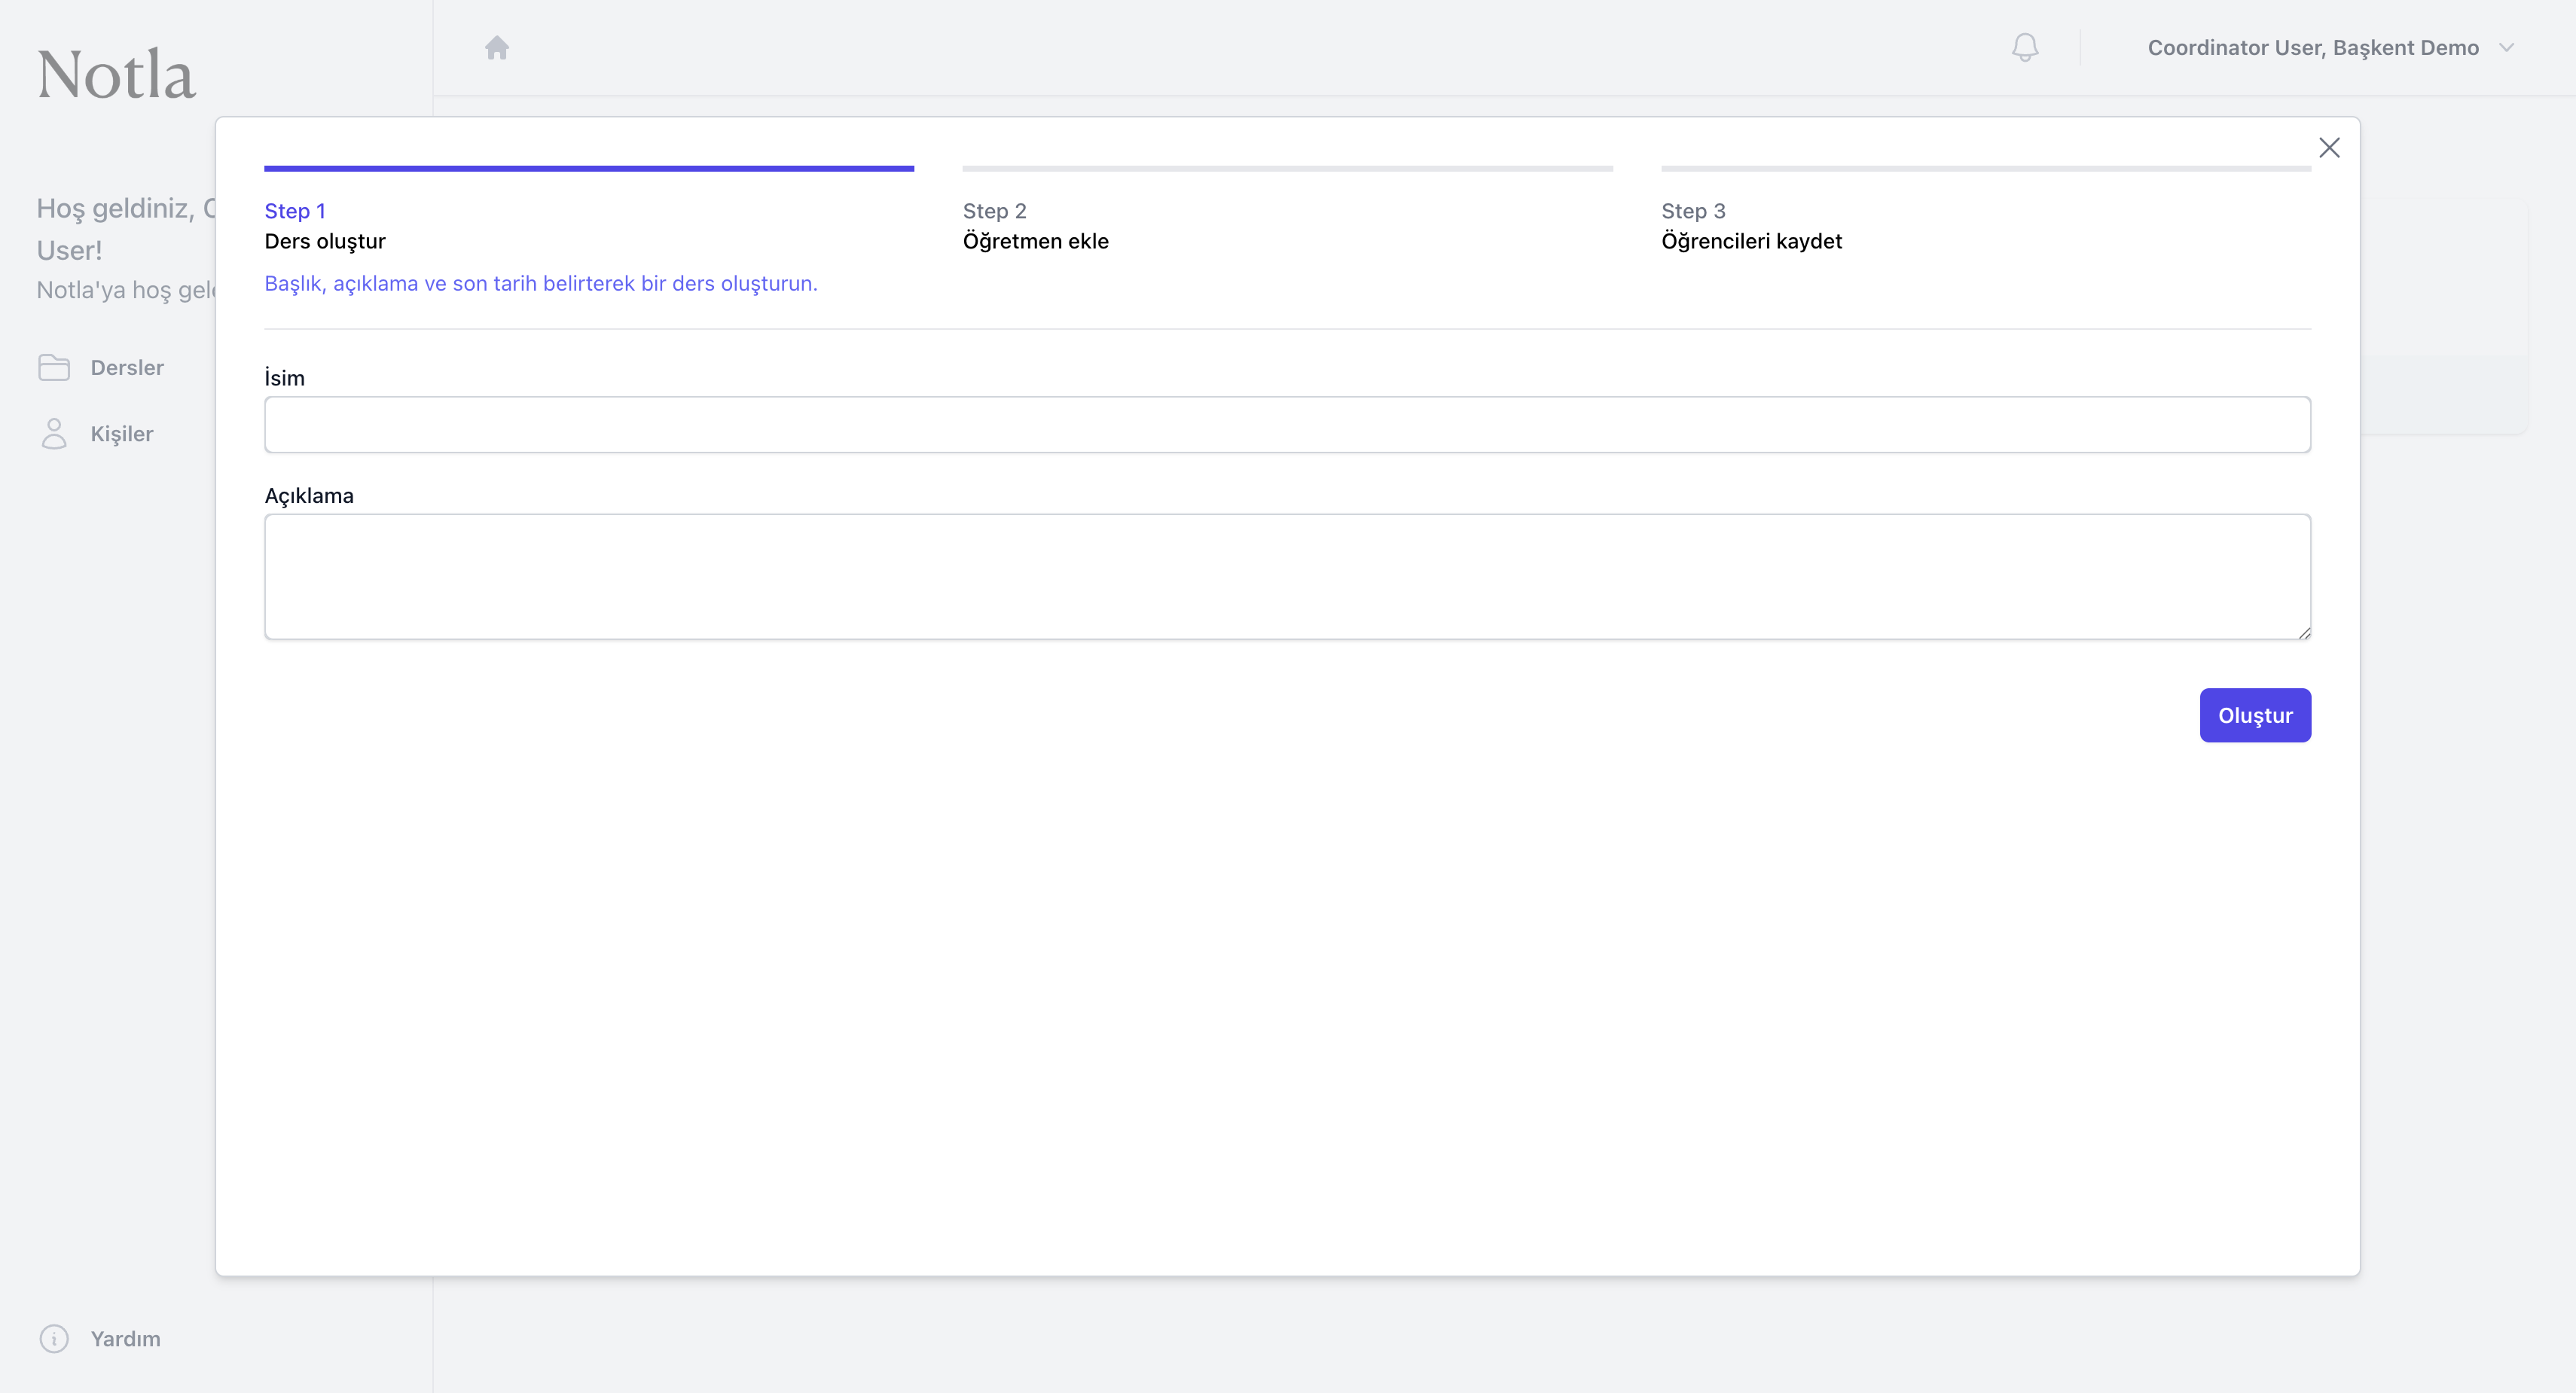
- İsim alanına dersin görünen adını yazın (örnek:
Türkçe Dersi,Fen Bilimleri). - Açıklama kısmı isteğe bağlıdır; sınıf, dönem veya konu gibi bilgileri eklemek için kullanışlıdır.
- Oluşturdüğmesine bastığınızda ders kaydedilir ve sihirbaz otomatik olarak Adım 2'ye geçer.
Adım 2 — Öğretmen ekle
İkinci adımda derse en az bir öğretmen atamanız gerekir. Açılan tabloda kurumdaki tüm kullanıcılar listelenir; öğretmen olarak eklemek istediğiniz kişileri işaretleyip Ekle düğmesine basın.
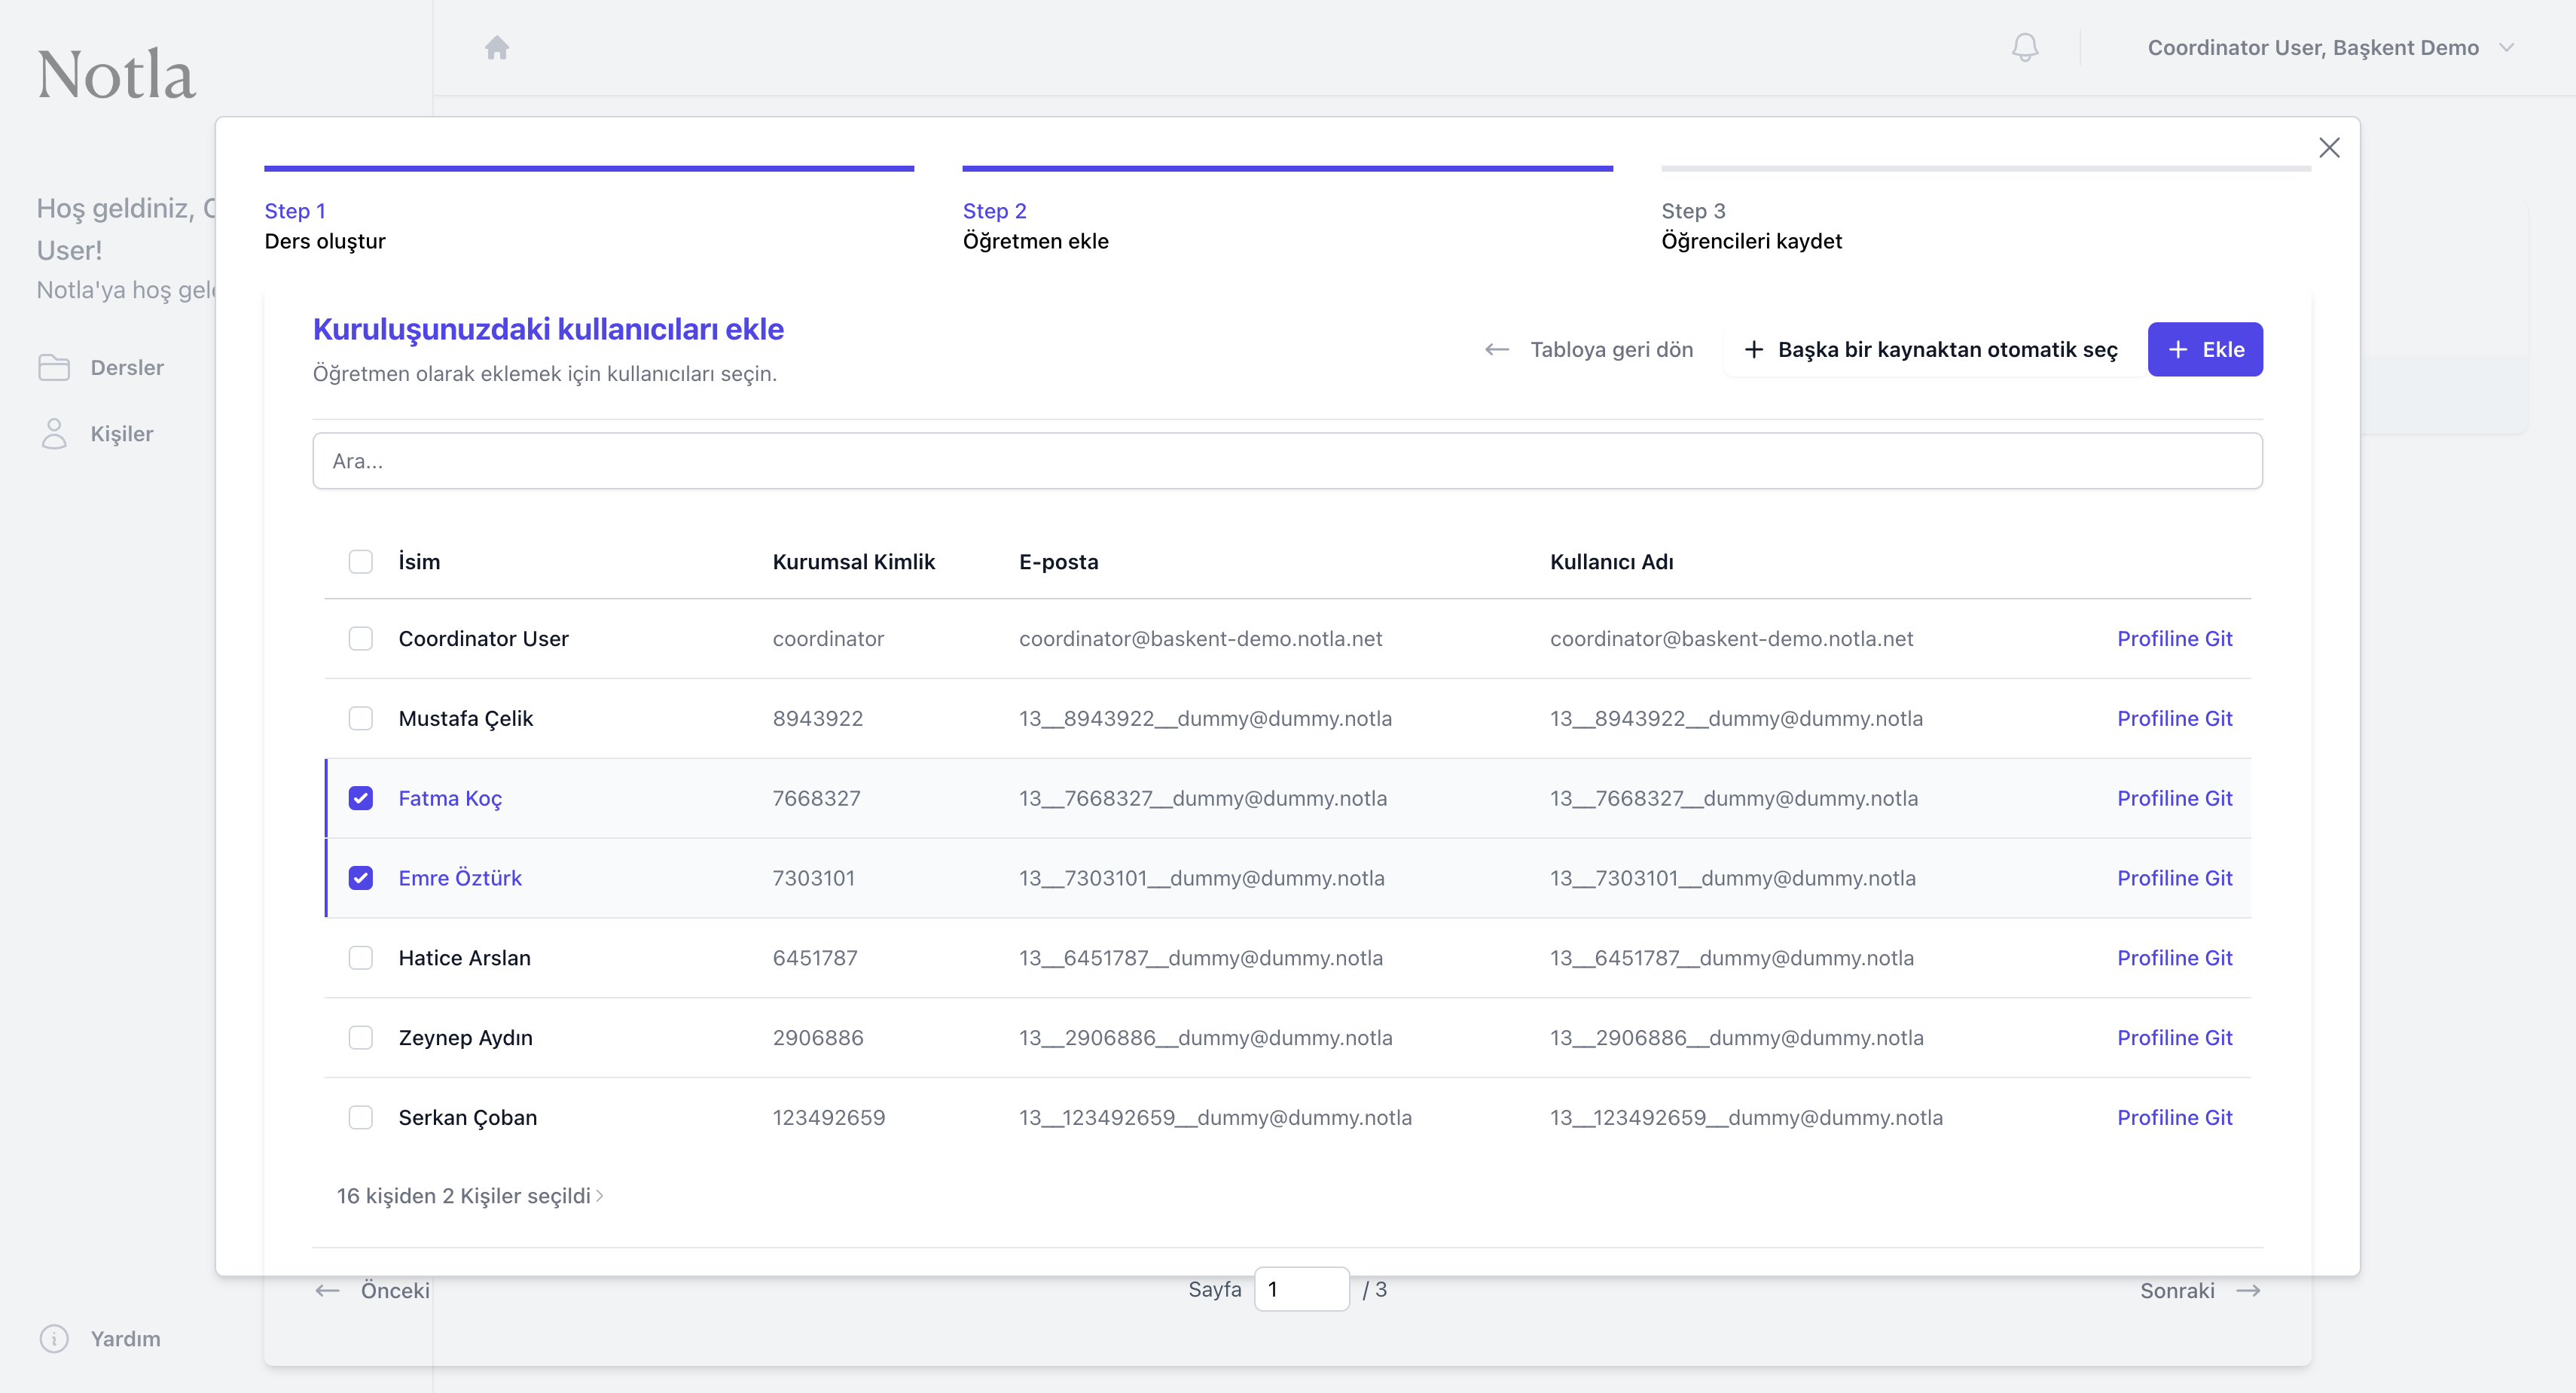
- Arama kutusu isim, kurumsal kimlik, e-posta veya kullanıcı adına göre filtreleme yapar.
- Profile Git bağlantısı bir kullanıcının ayrıntılarını ayrı bir sekmede açar; emin değilseniz seçimden önce profili kontrol edin.
- Sayfalı tablonun altında kaç kişi seçildi bilgisi görünür. Birden fazla öğretmen seçebilirsiniz.
- Tabloya geri dön düğmesi seçimi temizlemeden tabloya geri döner. + Başka bir kaynaktan otomatik seç dış sistemlerden (CSV vb.) toplu seçim yapmaya olanak tanır.
Adım 3 — Öğrencileri kaydet
Üçüncü ve son adımda derse kaydolacak öğrencileri seçin. Tablo Adım 2 ile aynı arayüzü kullanır; bu adımda işaretlenen kullanıcılar 'Kayıtlı Öğrenciler' listesine eklenir.
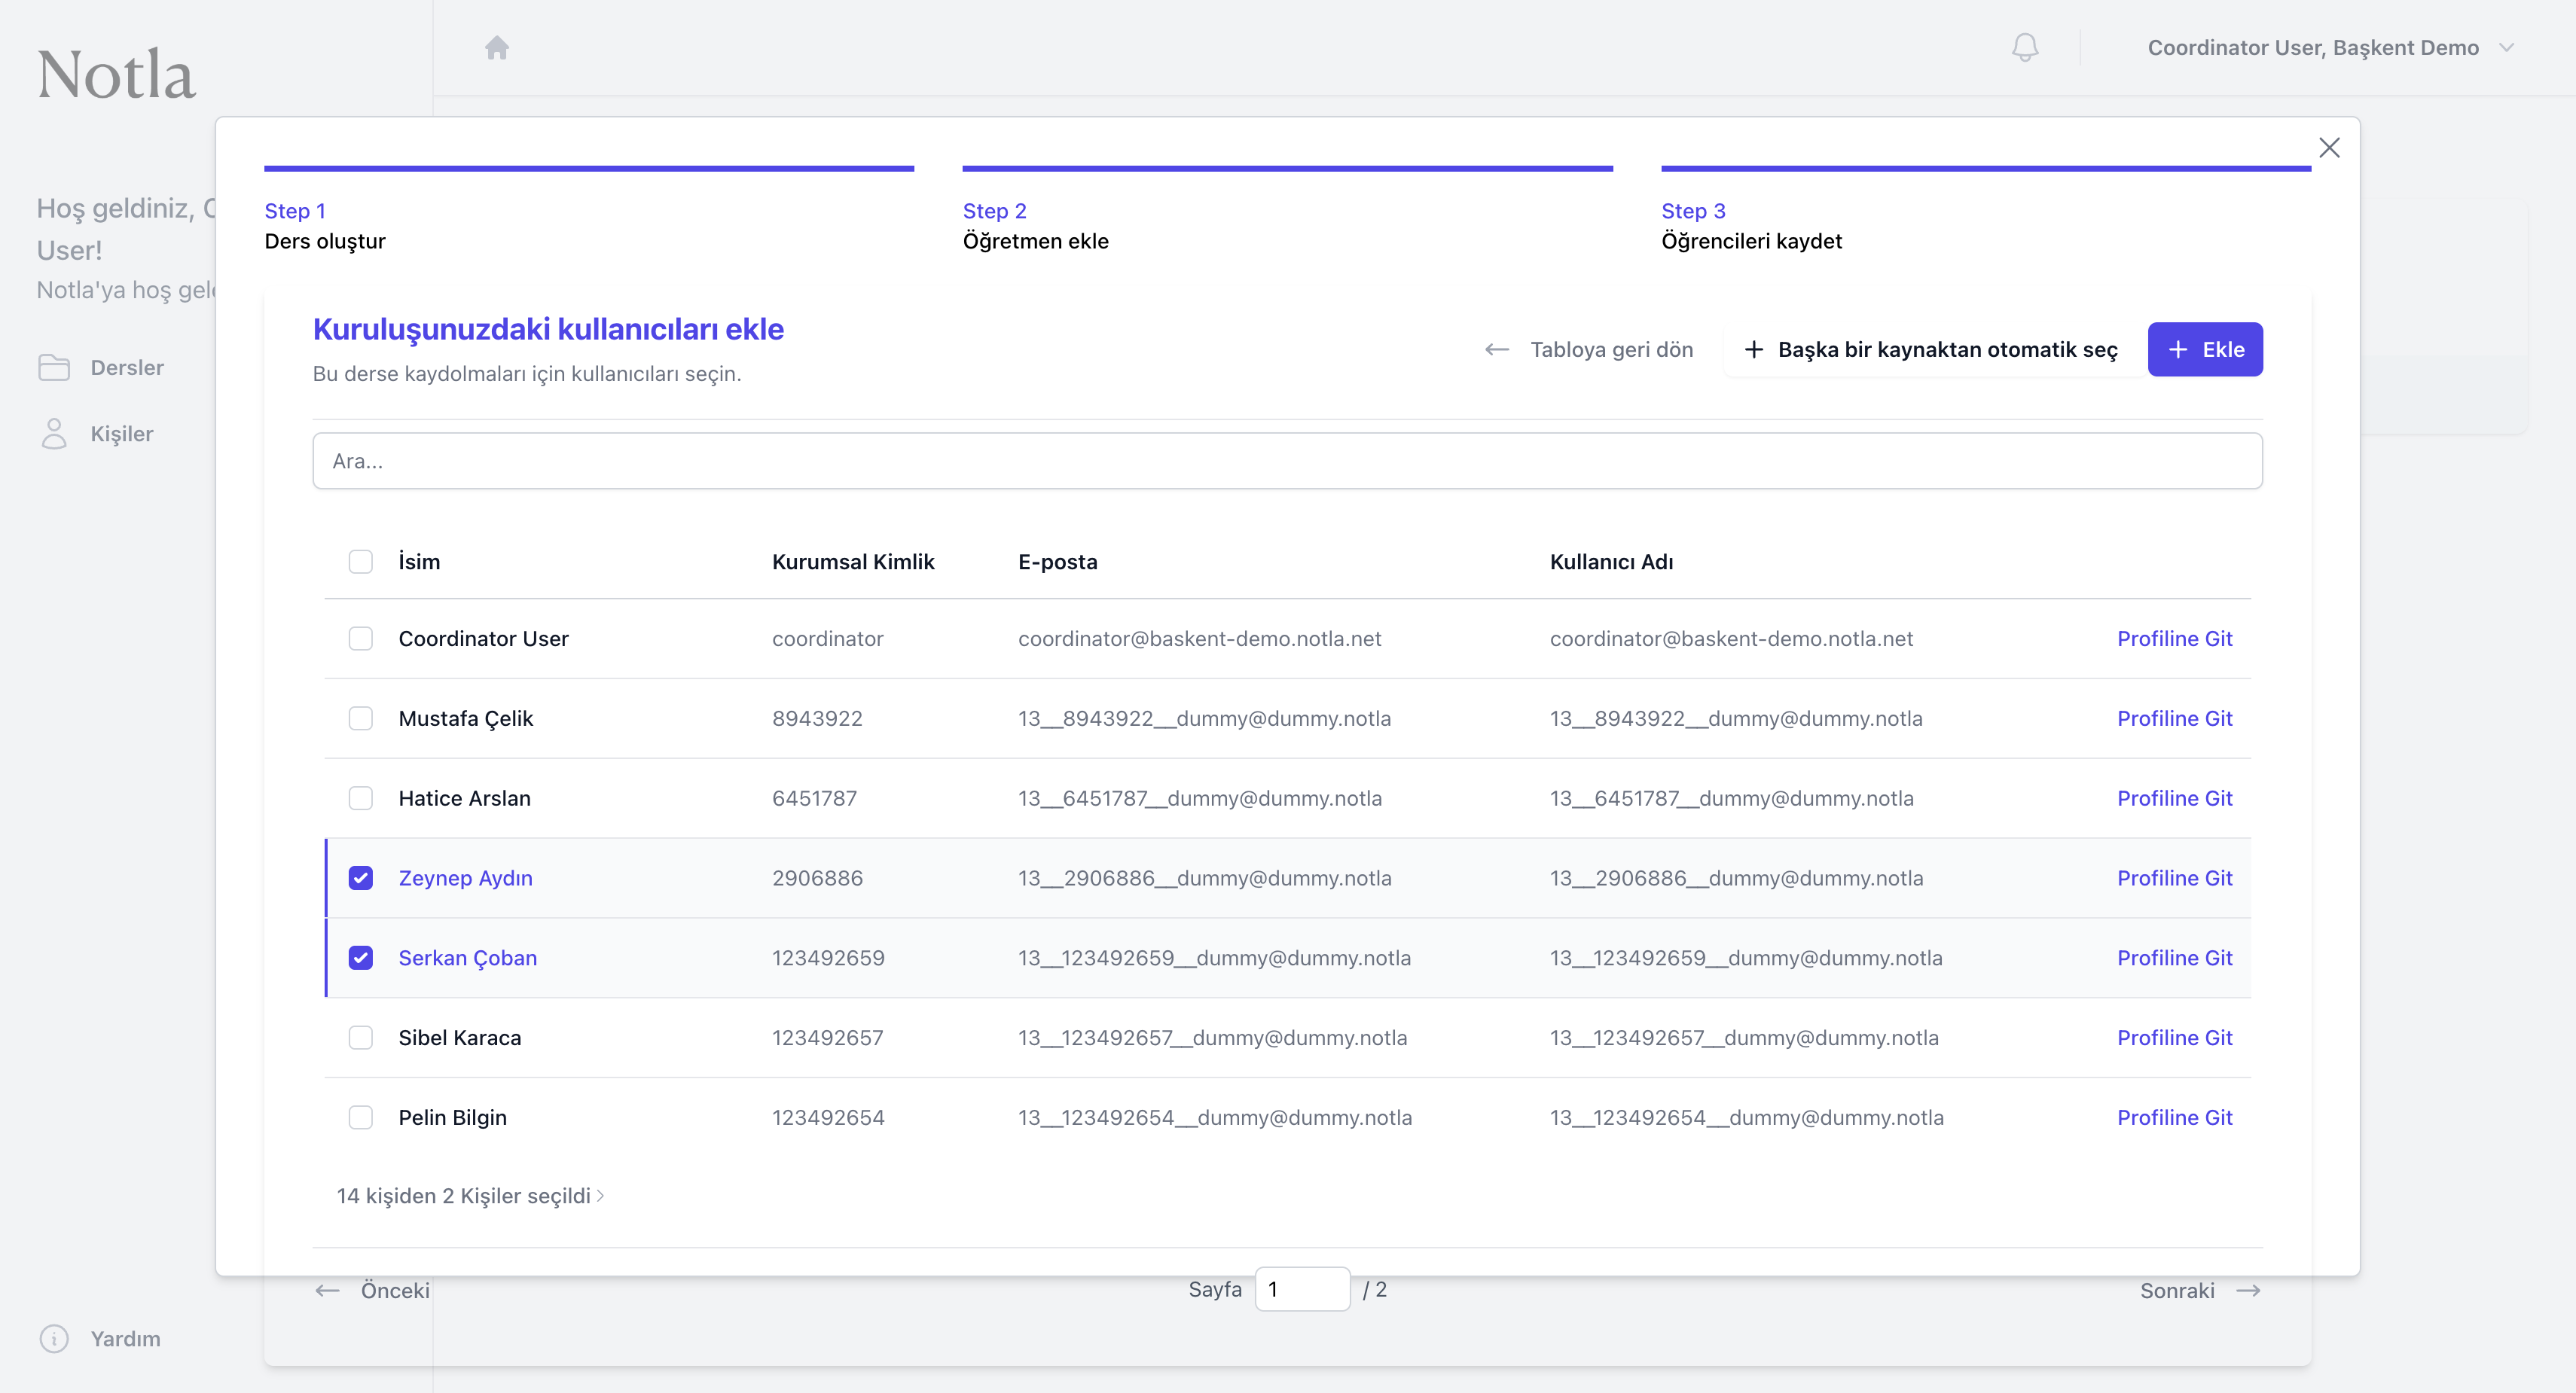
- Bir kullanıcı hem öğretmen hem öğrenci olarak aynı anda seçilemez. Adım 2'de öğretmen olarak eklediğiniz kişiler bu listede de görünür ancak işaretlemenize izin verilmez.
- Listede yer almayan bir öğrenci varsa, + Başka bir kaynaktan otomatik seçile CSV'den hızlıca içe aktarabilir veya Kişiler sayfasından önce kullanıcı olarak ekleyebilirsiniz.
- Ekle düğmesine bastığınızda dersin kurulumu tamamlanır ve doğrudan ders detay sayfasına yönlendirilirsiniz.
Adım 3 — Hiçbir öğrenci seçilmemiş
Henüz hiçbir öğrenci işaretlemediğinizde Ekle düğmesi pasif kalır. İlerlemek istemiyorsanız 'Tabloya geri dön' ile kapatabilir veya bu dersi ileride öğrenci eklemeye açık olarak bırakabilirsiniz.
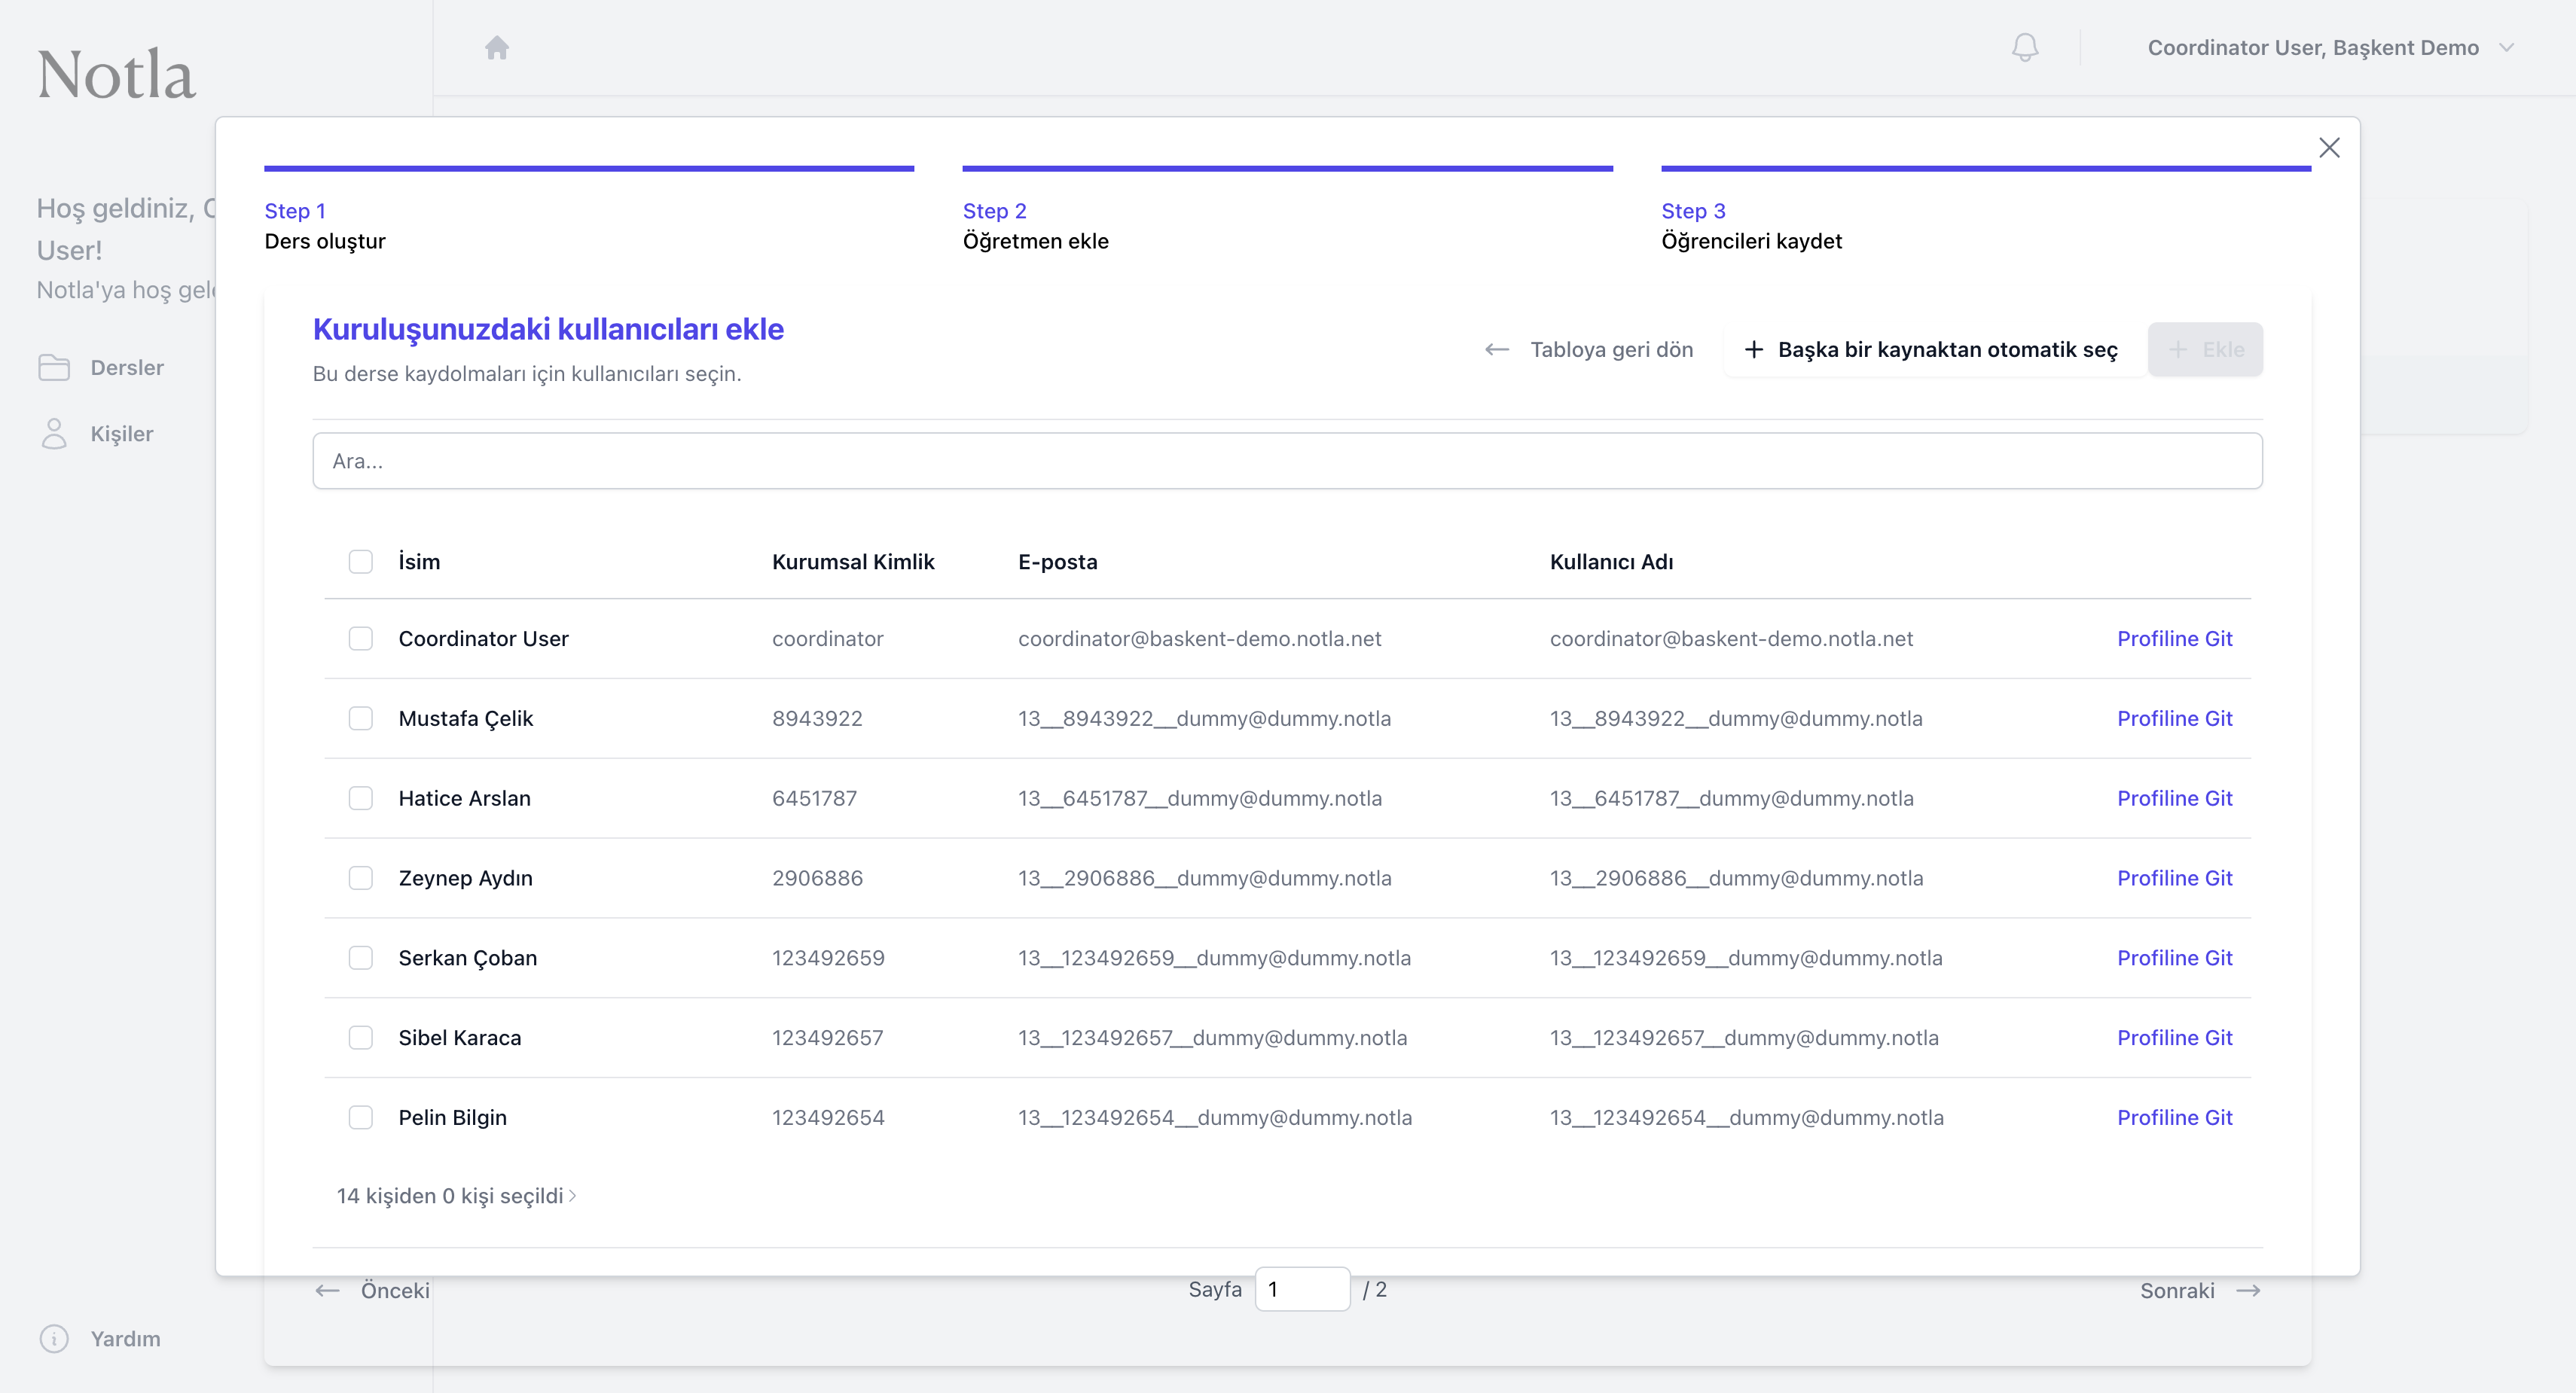
- Sıfır öğrenci ile dersi oluşturmaya devam etmek isterseniz sihirbazı sağ üstteki
×ile kapatın; ders kaydedilmiş halde kalır ve daha sonra ders ayarlarından öğrenci ekleyebilirsiniz. - Aynı tablo üzerinden birden fazla sayfada öğrenci arayabilirsiniz; sayfa numaralandırma alt kısımda yer alır.
Sonra ne olur?
Üçüncü adımı tamamladıktan sonra otomatik olarak yeni dersin detay sayfasına yönlendirilirsiniz. Buradan derse ödev/sınav ekleyebilir, mevcut öğrenci ve öğretmen listesini güncelleyebilir veya ders bilgilerini düzenleyebilirsiniz.